Getting Started with Your POS
Welcome to Bottle POS! This article covers some things you'll need to configure in the Admin before
 October 01, 2024
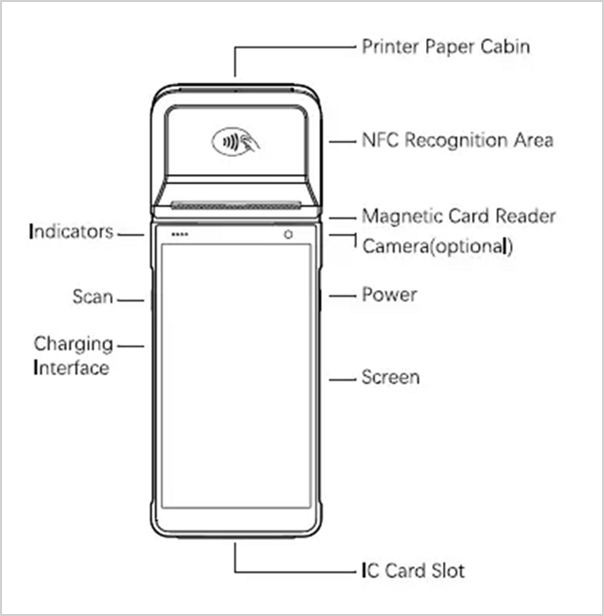
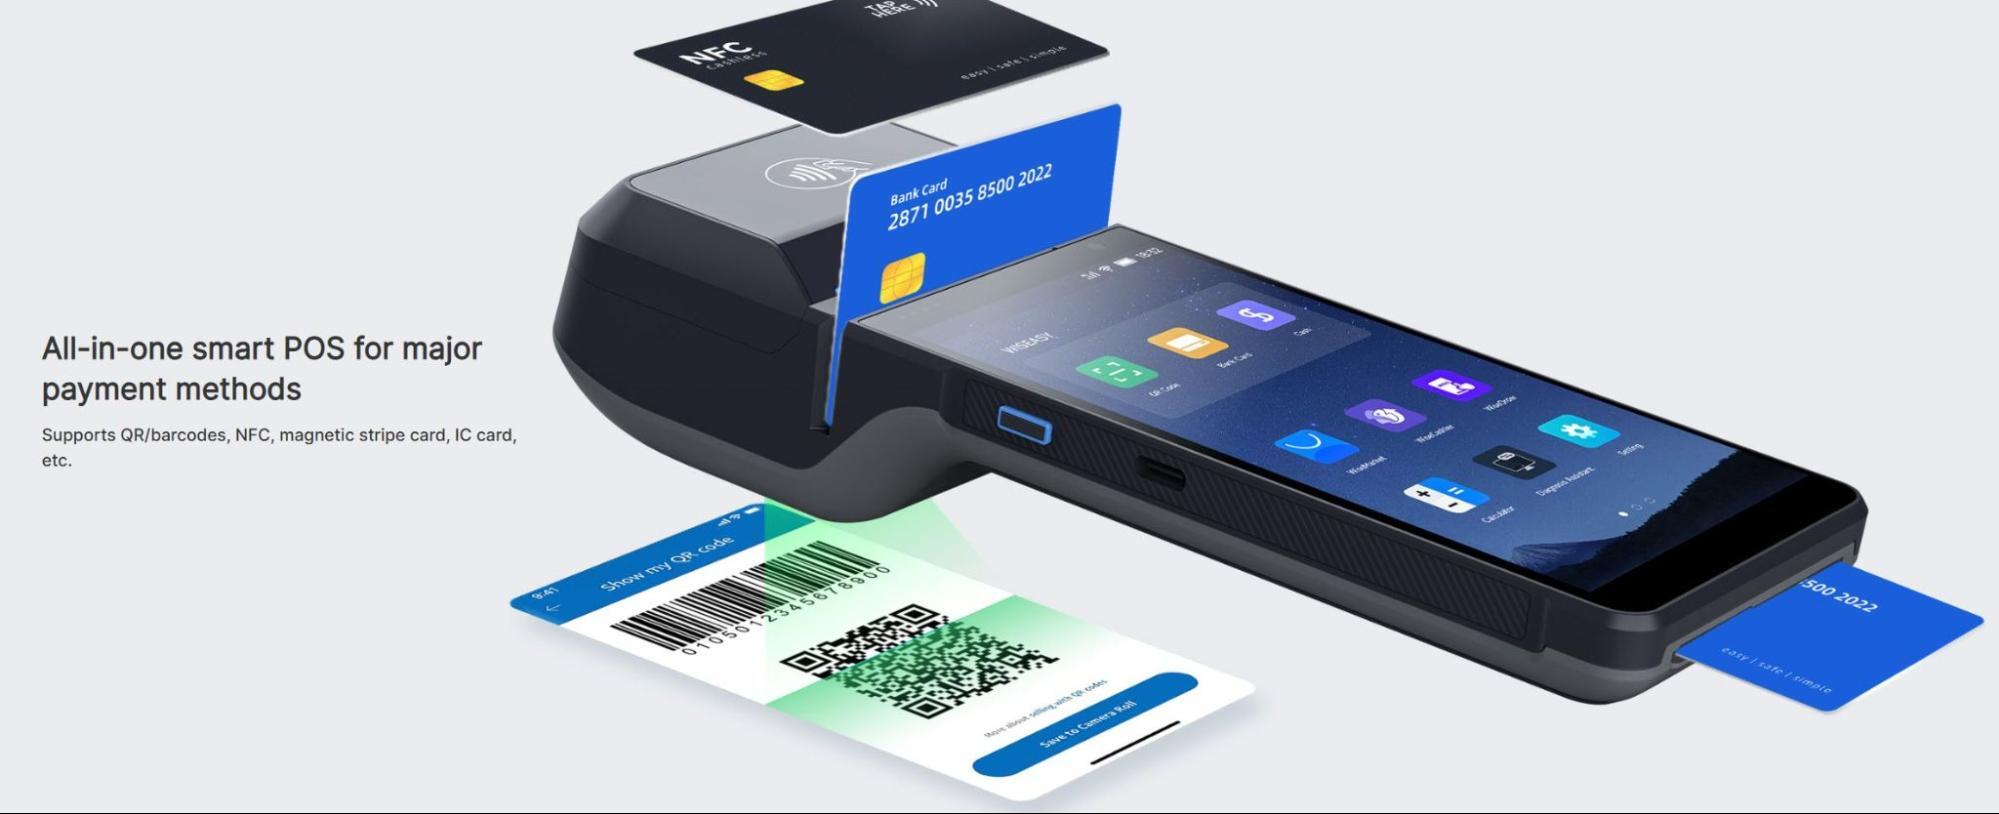
The Wiseasy P5 terminal is a wireless countertop terminal for Quilt subsidiaries. This state-of-the-art card reader accepts chip, contactless NFC, or swipe and the attached thermal receipt printer makes taking transactions easier than ever.
Our credit card readers are plug-and-play; simply connect it to a local Wi-Fi network, enter the pairing code, and start taking payments in minutes.
The P5 device is also low-maintenance with no additional upkeep required. Updates happen automatically using the Wi-Fi network with no interruptions and no hassle.
To view the terminal's parts and features, see the Wiseasy P5 product sheet.
Source: wiseeasy.com
Supported Countries
Supported Payment Methods
Supplies / Components
Features
Source: wiseeasy.com
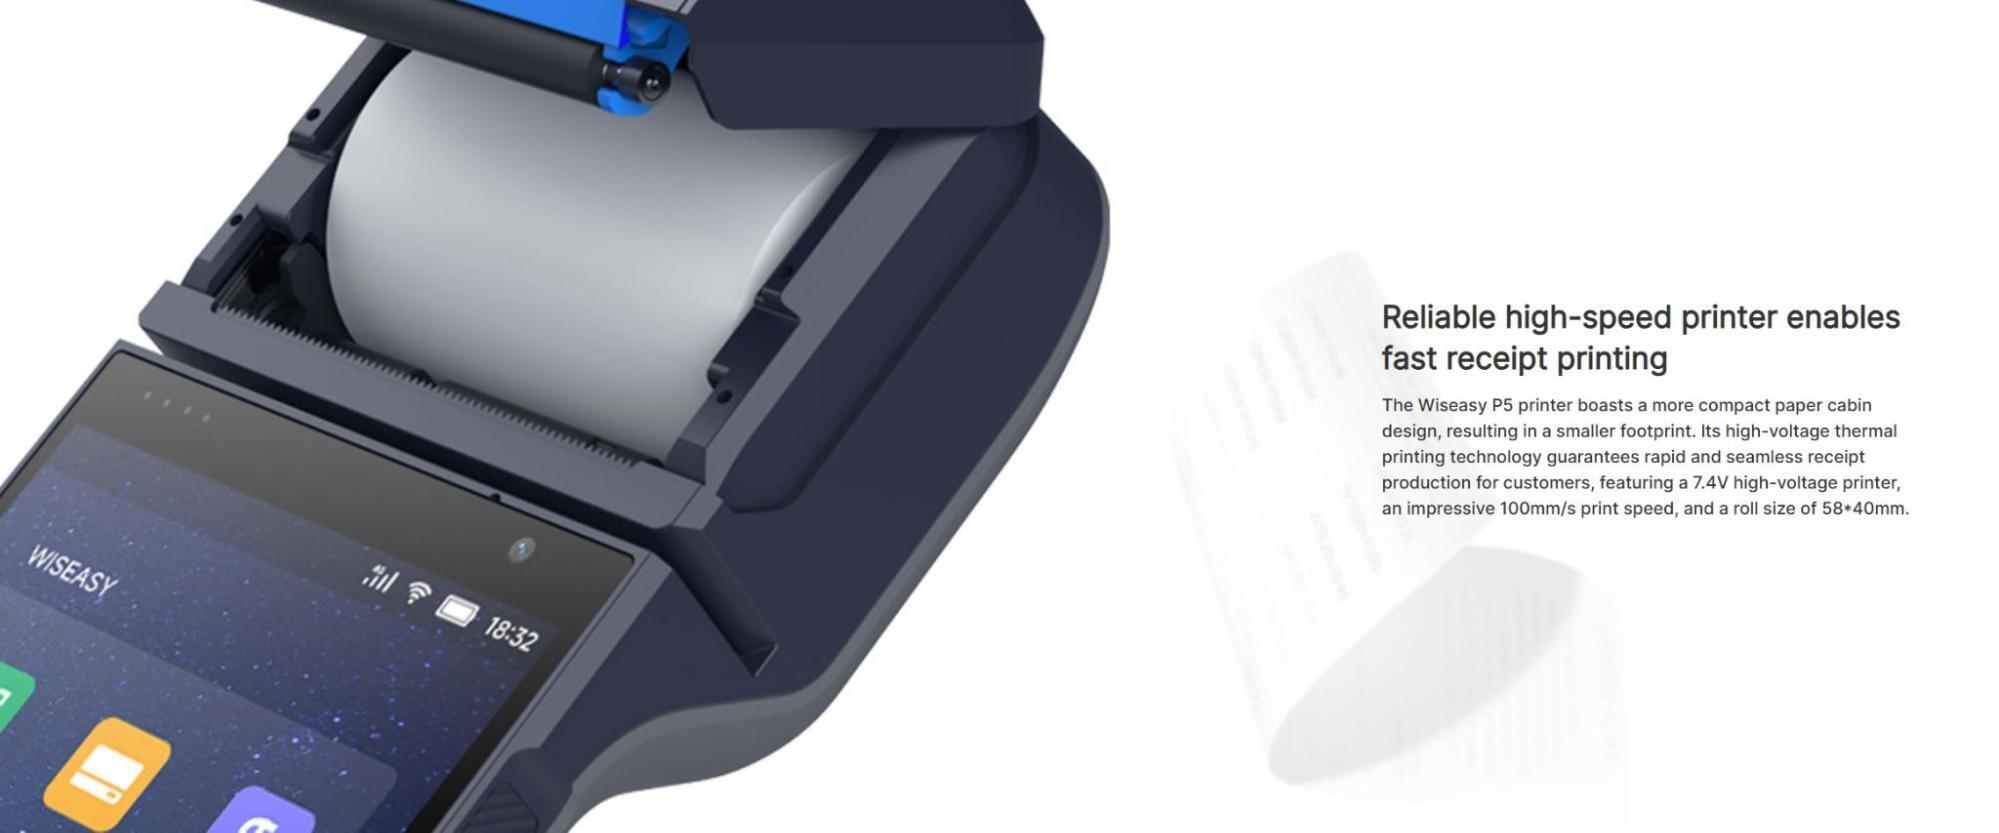
To load or replace the paper in the P5 terminal, grasp the cap (the top of the device with the Contactless icon) of the device on either side from the end and pull up away from the paper output.
Next, load the receipt paper face-down with the paper coming feeding out from the bottom.
Once the paper is loaded, close the lid and snap it into place.
💡Note: If the paper prints blank then swap the direction of the paper.
When you first receive the device, it should come partially charged. Use the USB-C wall charger to begin charging the device to full power.
Once charged for at least 30 minutes, hold down the power button on the right hand side until the screen turns on. Once the device is powered on, pressing the power button once will sleep/wake the device. To fully power off the device hold down the power button until the Power Off option is shown on the screen, then tap it.
If you need to replace the battery, lift up from the indentation at the bottom-center of the back cover to detach it from the device.
💡Note: Ideally the terminal should be powered off each evening and powered on each morning to receive automatic software updates.
The terminal must be connected to the internet before it can be paired or updated. For best performance, it should be connected to the same network as the point-of-sale computer.
💡Note: The Wi-Fi network must use WPA-Personal or WPA2-Personal encryption and be password protected. WiFi is not supported for non-password-protected networks or enterprise networks.
You can purchase USB-C to Ethernet adapters separately to use with a cable Ethernet connection if Wi-Fi is not available.
On some older versions of the P5 terminal, the Quilt PayFac application may not open by default and must be clicked on like an app on a smartphone.
Source: wiseeasy.com
Q: Does the P5 come with a charging cradle?
A: No, but you can order that separately. POS Nation P5 Charging Cradle
Q: There is only one roll of receipt printer paper, where can I get more?
A: The P5 uses standard 2" (58mm x 40mm) thermal paper rolls you can find in most office supply stores. You can order them by the case from the link below. ULine 2" 50-foot Thermal Receipt Paper Roll, Case of 50
Q: I have a question, but I can't find my answer here, how do I get more assistance?
A: You can ask any question at the number below. Contact our 24/7 support team at: (877) 381-4087
Is this page helpful?
×Help us improve our articles