Task Lists are an easy way to remind employees to perform certain tasks or track when they are being completed even if you aren't at the store. When a task is due, your employees will be notified on the so that they can complete the task. Find out how easy Tasks are in the !
To create and manage Tasks, you'll work in the Admin app. You can get to this part of the system by logging into your Admin and going to Tasks.
Tasks in the
Creating and Managing Tasks
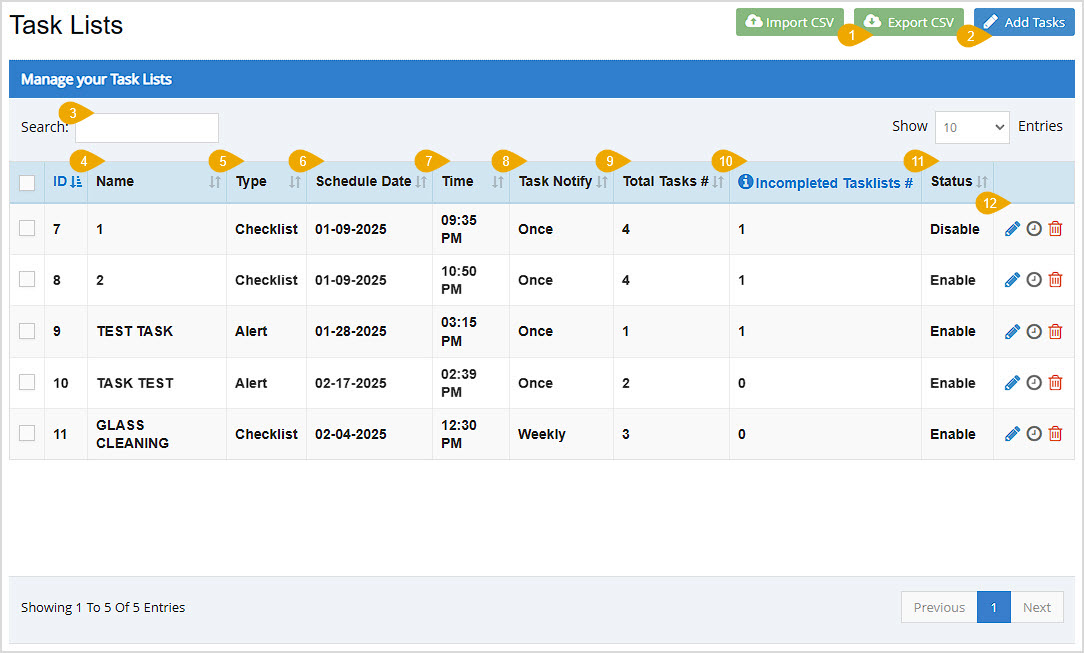
- Export CSV - For all tasks you've saved, you can click the Export CSV button to save a CSV download of all of the data across all pages. Please Note: The Import CSV function is something you can use, but it can be difficult to work with, so we recommend manually creating all Tasks using the instructions below.
- Add Tasks - You can click the Add Tasks button to create new Task Lists. For full details, see the section below on Creating Task Lists.
- Search - You can Search your Task Lists by Name, Date, or Time.
Please Note: You can use the checkboxes on the left to highlight Task Lists you want and then click the Export CSV button to export only those items. Otherwise, all Task Lists will export.
- Name - This column displays the Name you've given each Task List.
- Type - This column displays the Task List Type.
- Schedule Date - This column displays the date of the next task on each list.
- Time - This column displays the time of the next task on each list.
- Task Notify - This column displays the cadence of how often the user will be notified about tasks on the list.
- Total Tasks Number - This column displays the number of tasks on each list.
- Incompleted Tasklists Number - This column displays the number of tasks on each list that have not yet been completed.
- Status - This column displays the Status of each Tasklist, either Enabled or Disabled.
- Actions - You can use the Action icons on the right of each line-item to do the following functions for existing Tasks:
- Pencil Icon - You can click this icon to Edit any of the Task details.
- Clock Icon - Click this icon to view the History of the Task.
- Trashcan Icon - Click this icon to Delete the Task. You'll be asked to confirm you really want it deleted.
Creating Task Lists
Please Note: Items with a red asterisk are required in order to save your Task.
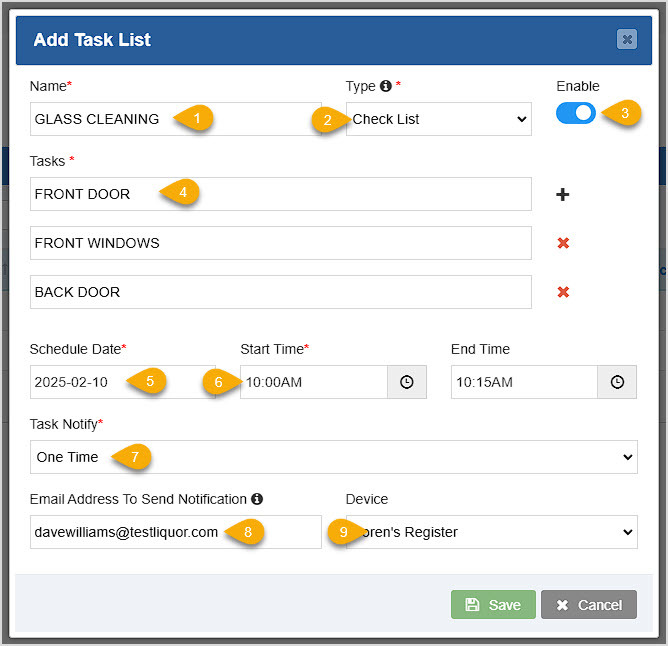
Once the Task Lists page has loaded for you, to start, in the upper right click the Add Tasks button. The Add Task List window will open:
- Name - Enter a Name that will make sense to you and your team.
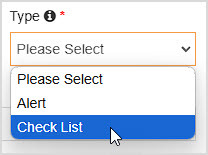
- Type - There are two types of Tasks; Alerts and Checklists. Use Alerts when you want an alert to pop up in the Register. Alerts can have more than one Task, if needed. Use Checklists for multiple tasks. For both, the number of Uncompleted tasks or lists will display in the Register above the Tasks button at the top. In both types, tasks can be marked completed, and each task in the list can be separately marked Completed as you go (see the Tasks in the Register section below).
- Enable / Disable - The Status of the Task can be set here. By default, Tasks are Enabled.
- Tasks - Describe the Task in this text field. Click the + Button to add more as needed. Use the X button to remove a task if needed.
- Schedule Date - You can schedule the Task for today or any future date. Clicking this area opens a date picker calendar for you.
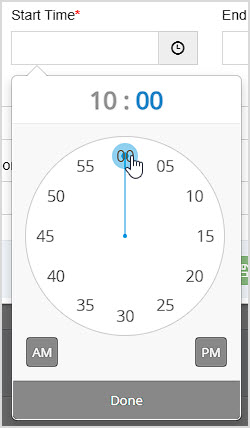
- Start Time & End Time - Your Tasks will need at minimum a Start Time. Click in the field or click the Clock button to open the time picker. You can drag the hands for the clock to where you want to first set the hour, then click on the minutes area (shown selected below) and the clock will change to minutes and you can do the same thing for 1 - 60 minutes. Set AM or PM and then click Done when you're ready. Selecting an End Time is optional.
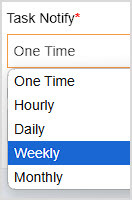
- Task Notify - To set the cadence for the task notification click this list and you can choose from One Time, Hourly, Daily, Weekly, or Monthly.
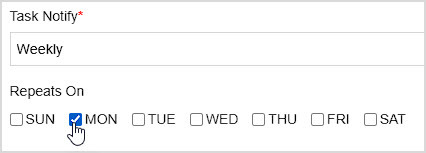
If you set the Weekly cadence, you'll have the ability to set which day(s) of the week it Repeats On in the Tasks list.
- Email Address Notification - If someone needs to be notified when the task is completed, adding the email address here will send an email notification.
- Device - You can either set the Task to appear on All Configured Devices, or you can choose an individual device as needed.
When you're done, click Save (or Update if you're editing) and you'll see your Task on the list. It will become active when it's scheduled date and time come up. A popup will let you know the save was successful.
Working With Tasks in the Register
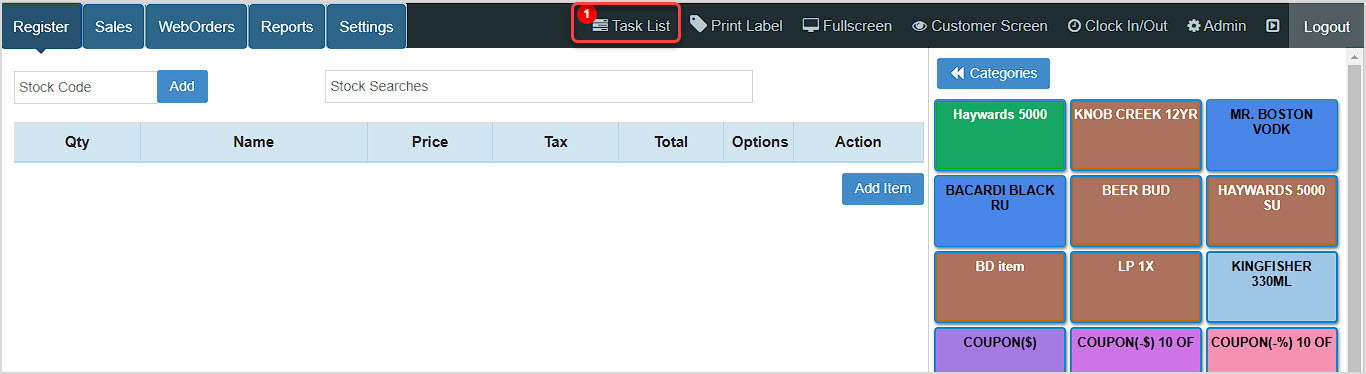
You can get to this area by logging into your Register App. The Register page will load for you.
For Checklist type tasks and for Alerts, you'll see the number of uncompleted tasks above the Task List button at the top, as shown above. If you have active incomplete Alert tasks, you'll see the Alert in the lower left of the Register, as shown below.
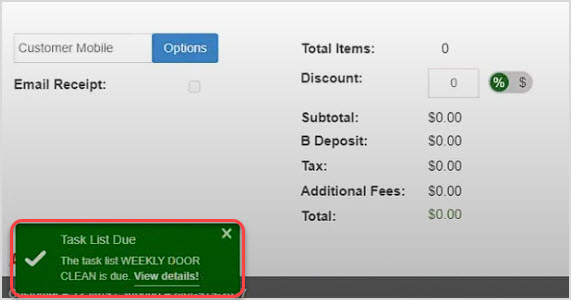
You can click either area to view your Task Lists. The Task List Details window will open:
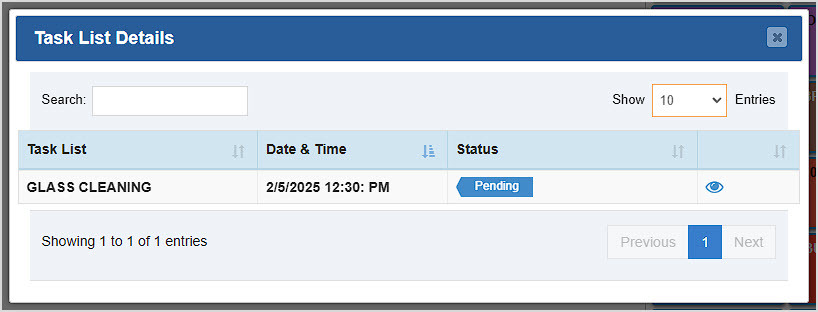
You can click the Eye Icon on the far right to view the details of Tasks in the Task Details window.
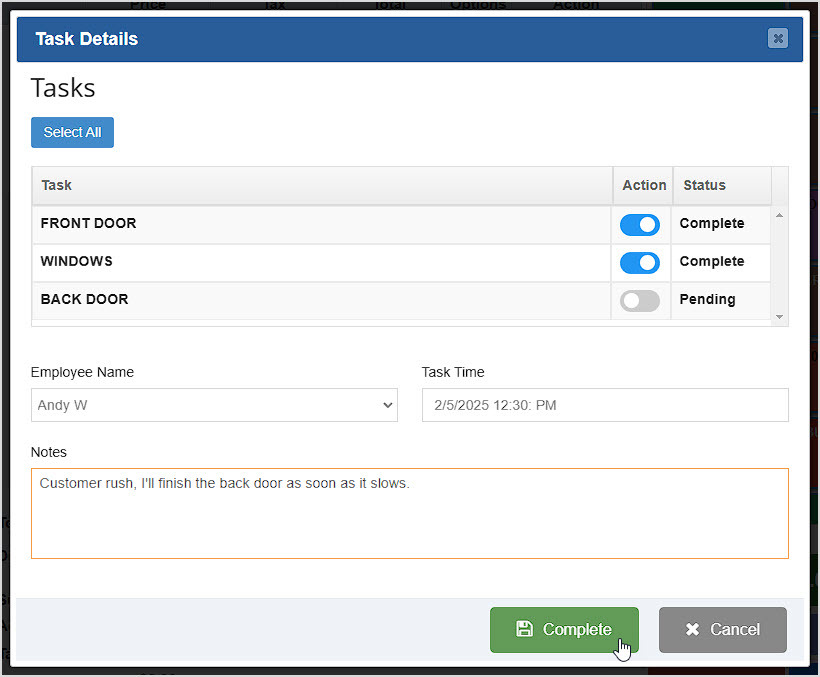
Use the Action column toggles to mark Tasks as Complete. If you need to change the Employee Name you can do so with that drop-list. You cannot adjust the Task Time or Date from here, but on the Tasks page of the Admin App you can do so. You can enter Notes if needed: they will be saved in the Task History next to the completed task on the Tasks page Admin App. Click the Complete button to save any changes you have made. Please note this only saves notes and status changes, Pending tasks will remain in that status.
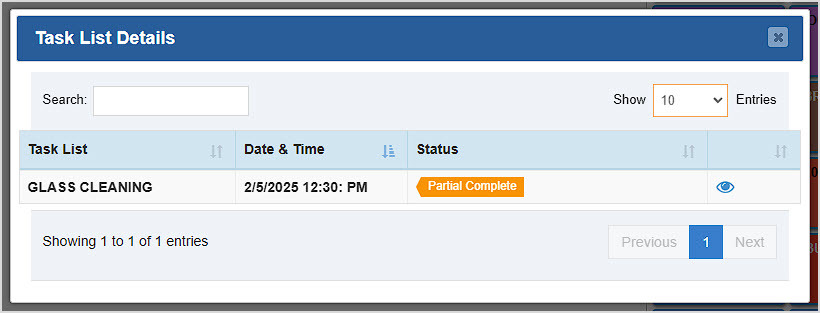
In the example above, two of the three Tasks in the list were Complete. Once it was saved, the overall task of Glass Cleaning is now in a status of Partial Complete. When all tasks are finished, it will be in a Complete status:

When you close the Task List Details window, you'll be asked to confirm that you want to mark the tasks as completed you have set that way.
Related Topics
Register Tour
Frequently Asked Questions
Q: Can I have more than one task on my Register at once?
A: Yes, you can have multiple tasks at different times of the day or all at the same time if you desire.
Q: I have a question, but I can't find my answer here, how do I get more assistance?
A: You can ask any question at the number below. Contact our 24/7 support team at: (877) 381-4087
 October 01, 2024
Is this page helpful?
×Help us improve our articles