Learn how to add Categories in your Bottle POS software. Categories are an important part of organizing your inventory items. Your Bottle POS software offers the ability to build out your categories into two levels of organization. Keep reading to learn more!
To get started, login to your Admin and click Items, then, click on Categories in the Items menu.
Viewing the Category Page
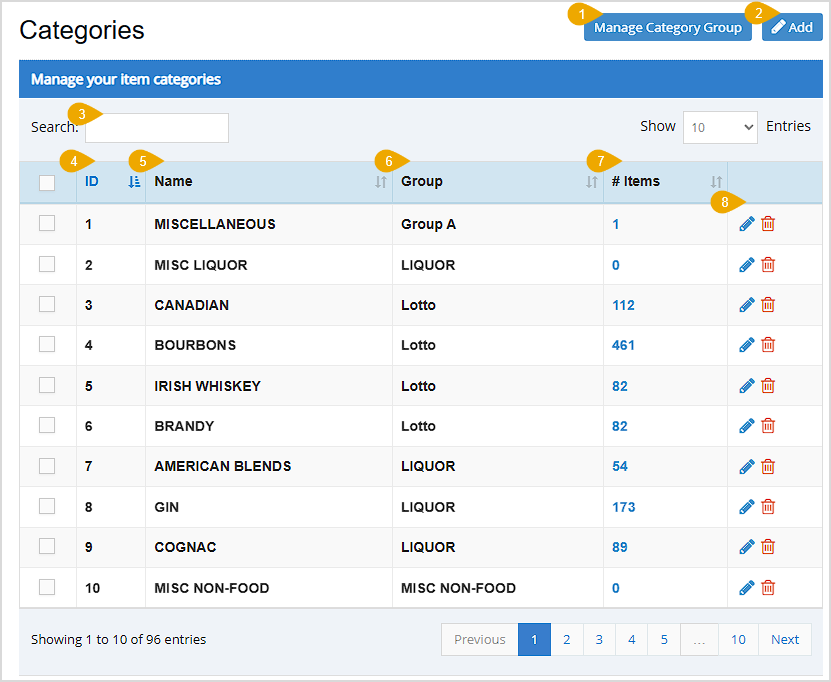
You can click the column headers to sort or click again to reverse-sort column data alphanumerically.
- Manage Category Group - Click this button to open the Manage Group Category window, allowing you to add, edit, and delete Category Groups.
- Add - Click this button to open the Add Category window.
- Search - Enter text into the Search to find a specific item or value.
- ID - This column displays the identification number of each category. This number is only used internally by the system.
- Name - This column displays the name of each category.
- Group - This column displays the category group for each category.
- Number of Items - This column displays the number of items within each category.
- Actions - By clicking the Pencil Icon, you can edit a category. Click the Trashcan Icon to delete a category. You'll be asked to confirm deletion, and any items that were in the deleted category will no longer have a category.
Working With Category Groups and Categories
The Bottle POS software allows you to organize items in two levels; Category Groups, and Categories. Here's an example of what the recommended relationship between these two areas should look like:
- Category Group: Liquor
- Categories: Bourbon, Vodka, Tequila, Gin, etc.
Creating Category Groups
In order to add, edit, or delete Category Groups, click the Manage Category Group button at the top right of the screen. The Manage Group Category window will open. This window shows the simple Category Group ID used by the system, the Category Group Name, and a Pencil icon to Edit and a Trashcan icon to Delete the Category Groups. If you click to delete a Category Group, you'll be asked to confirm deletion. Categories in deleted Category Groups will no longer have a Category Group.
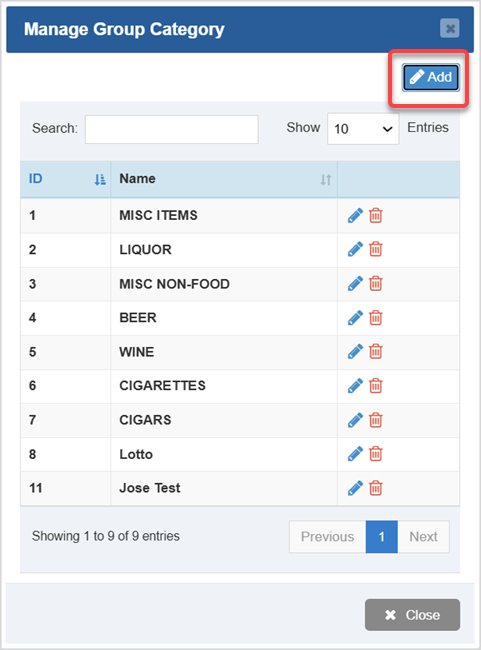
- Click the Add button in the upper right of the Manage Category Group window. The Add Group Category window will open.
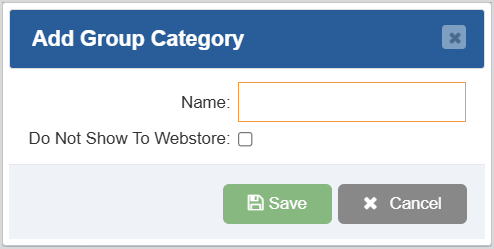
- Enter the desired Name for your Category Group.
- Check the Do Not Show To Webstore box if you do not want the items in the Categories of the Category Group to show in your webstore.
- Click the Save button to create the Category Group. This will return you to the Manage Group Category window.
Creating Categories

To add a Category, click the Add button in the upper right of the Categories page and add the following information:
- Category Group - Click this drop-list and choose the Category Group that the Category will be added to, if any.
- Name - Enter the Name you want for the Category.
- Default Tax - Click this drop-list to select the Tax Rule you want to use by default for Items in the Category.
- Age Verification - Enter the age required if the Category contains age-restricted products. Entering an age here will require a qualifying age to be entered in the Register when customers purchase any items in the Category.
- Default Margin - Enter a default Profit Margin percentage number for items in the Category. The support team will need to help you set up this automated functionality.
- Allow EBT - Check this box to allow the EBT payment method to be eligible for items in the Category.
- Do Not Discount - Check this box to prevent the items in this Category from receiving discounts.
- Do Not Show To Webstore - Check this box to not show the items in this Category on your webstore.
- Exclude Non-Cash Adj - Check this box to charge the same amount for cash or card when customers purchase items in the Category.
- Exclude Loyalty Reward - Check this box to prevent items in this Category from generating loyalty reward points.
Click the Save button to create your Category.
Related Topics
How to Enable and Use Customer Loyalty
How to Set Up Age Verification
Frequently Asked Questions
Q: How many categories can I have?
A: There's no limit to how many categories you can have for your items.
Q: How many items can a category hold?
A: There is no known limit of items that a category can handle.
Q: I have a question, but I can't find my answer here, how do I get more assistance?
A: You can ask any question at the number below. Contact our 24/7 support team at: (877) 381-4087
 October 01, 2024
Is this page helpful?
×Help us improve our articles