Have a lot of bottles in your inventory? Organize them by Category Group and Category to make it easier to find them in your Register and in your WebStore! Learn how below.
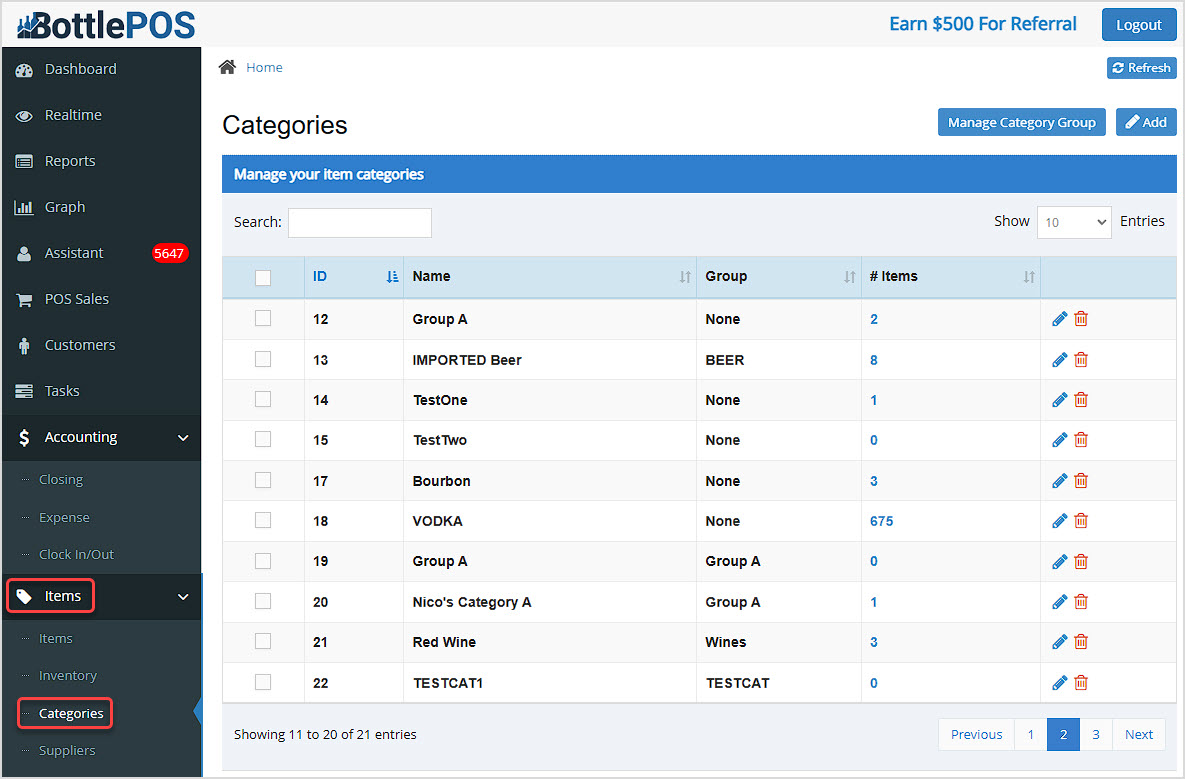
To learn how to create and manage your Categories and Category Groups we'll start in the back office Admin app. You can get to this part of the system by logging into your Admin app and going to Items > Categories.
Creating and Managing Your Item Categories
Explore how you can create the Categories you need for your items and how to place them into Category Groups that make sense. From the Categories page pictured above, start by clicking the Manage Category Group button in the upper-right. The Manage Group Category window will open for you.
Please Note: The line-item checkboxes on the left currently don't have bulk functions for this page.
Working With Your Category Groups
Your Bottle POS software has the ability to organize product categories by two levels: Category Groups and Categories. Here's an example of what the recommended relationship between these two levels could look like:
Category Group: Liquor
Categories: Bourbon, Vodka, Tequila, Gin, etc..
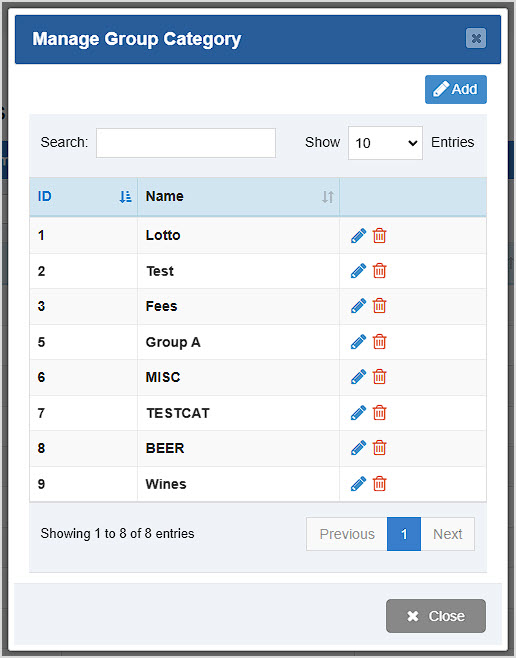
Here is how you can work with your Category Groups in the Manage Group Category window:
- If you have a lot of groups, you can Search by ID or Name to go straight to the one you want.
- You can Edit or Delete any Category Groups as needed using the Pencil and Trashcan icons on the right, respectively.
- Click Add in the upper right to open the Add Group Category window.
- Enter the desired Name for your Category Group.
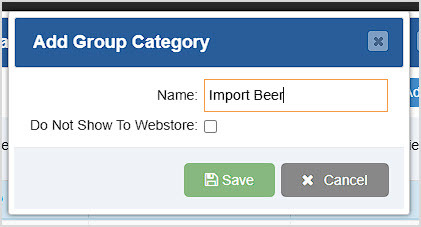
- You can check the Do Not Show to Webstore checkbox if you don't want to sell the items in the Category Group online.
- Click the Save button at the bottom when you're ready.
- You'll see your new Category Group in the list. Each Category Group is given a simple numeric ID number that will progress as you create additional groups.
- When you're done with your Category groups, click Close to return to the main Categories page.
Working With Your Categories
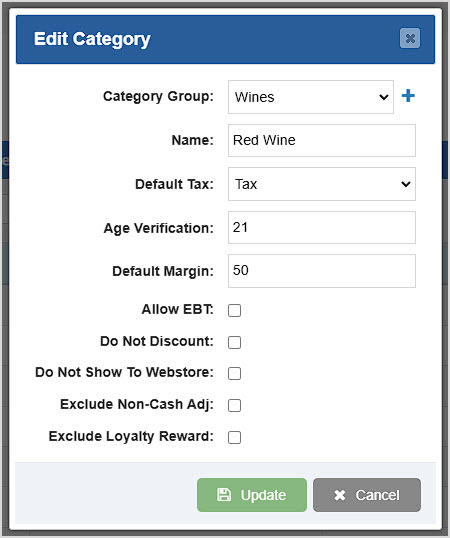
When adding a new Category, you'll see a blank version of the Edit Category window.
To add a Category, click the Add button at the top right of the Categories page. The Add Category window will open for you. You can Edit existing Categories by clicking the Pencil icon on the right, or Delete them with the Trashcan icon.
- Category Group - Select the Category Group to which this Category will be added. If the Category Group does not yet exist, you can click the + button to create it.
- Name - Enter the Name for the Category.
- Default Tax - Select the default Tax Rule for this Category.
- Age Verification - Define an Age Verification age for the Register to confirm if the Category will contain age-restricted products.
- Default Margin - Define a Default Margin for items in this Category. This will automatically enter Prices fitting the desired profit margin for items in the Category if you have the Auto Set Min Prices automation configured in the Automation Settings area of the Admin General Settings page. Otherwise, you'll manually enter Prices and will see your margins calculate automatically when you do.
- Allow EBT - Checking this box will allow customers to use EBT / Food Stamps to pay for items in this Category.
- Do Not Discount - Checking this box will restrict the items in this Category from receiving discounts in the Register.
- Exclude Non-Cash Adj - If you use Dual Pricing in the Register for reduced pricing when customers pay with Cash, you can exempt items in this Category from that higher card pricing and only charge the lower Cash price for items if this box is checked.
- Exclude Loyalty Reward - If the Category will contain items that you don't want to generate Loyalty reward points, check this box.
- Click the Save button (for new) or the Update button (for edit) to add or update your Category.
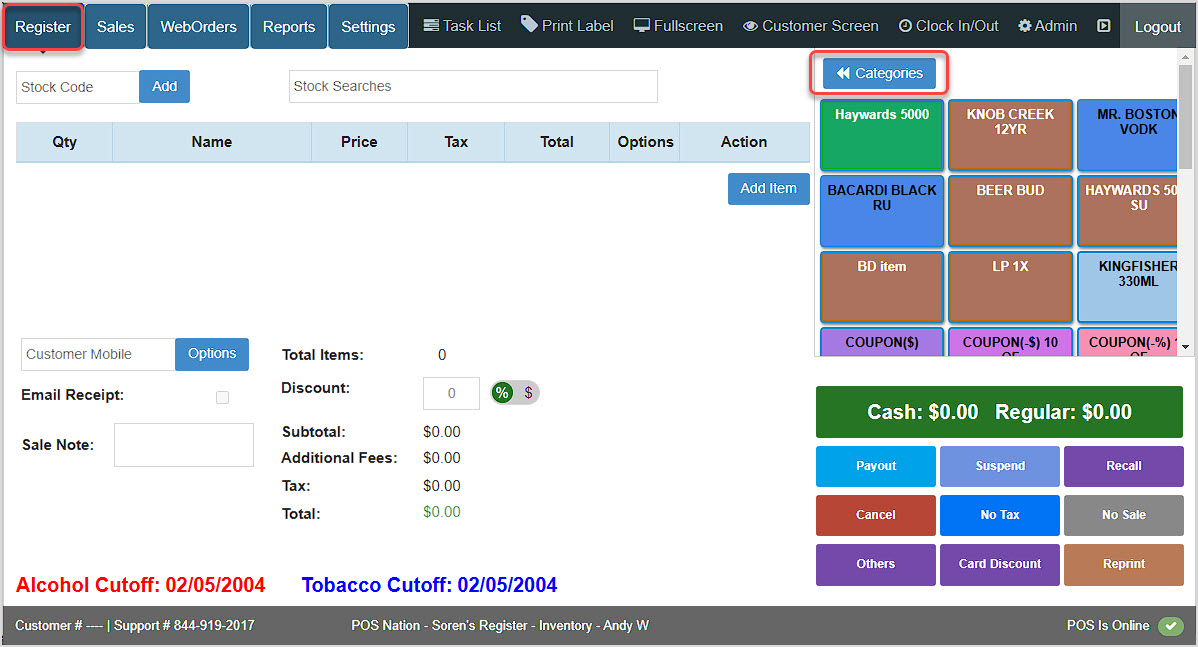
Working With Categories in the Bottle POS Register
Before you can select from categories during a Bottle POS transaction, you must create at least one Category and add at least one Item to it. Category Groups are optional. If you do not have any categories with items in them, create them following the steps outlined above, and add Items to them from the Items page, Edit Item window (see the link below for the Manage Items Page article).
To work in this area, log into the Register App and the Register will load for you. Click on the Categories button in the upper right.
Please Note: if you have not created any Categories, this will not be visible.
Main Category List
The main list for your Categories has the following features: All items will show the Name and the number of items in the Category.

- Shortcut Keys - If you have created Shortcut Keys, this button will show you how many you have, and clicking it will take you back to where you can use them. You won't see this if you haven't created any Shortcut Keys.
- All Categories - Click to view all items in all categories (ungrouped). The number shown in the parentheses indicates the number of items you have in the database.
- Individual Category Buttons - Each Category Button will display the name and number of items, as in the example of Bourbon. Click on the Category Button to view all items under that category.
Category Item View
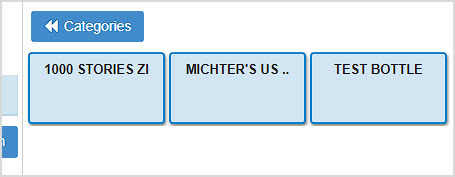
After clicking on our example Bourbon category above, we see the three items in the category and can click to add one or more items to the transaction.
- Click a button more than once to increase the Quantity for the item.
- Click the Categories button to go back to your main list of Categories.
Related Topics
Ringing Up Sales with the POS
Item Shortcuts
Manage Items Page
Frequently Asked Questions
Q: How many Categories can I have?
A: There's no limit to how many categories you can have for your items.
Q: How many items can a Category contain?
A: There is no known limit of items that Bottle POS categories can handle.
Q: I have a question, but I can't find my answer here, how do I get more assistance?
A: You can ask any question at the number below. Contact our 24/7 support team at: (877) 381-4087
 October 01, 2024
Is this page helpful?
×Help us improve our articles