Learn the basics of your easy-to-use Register app. You and your team will be running transactions right away!
You can get to this part of the system by logging into your Register app. The Register tab will be the first thing that loads for you. Below is a brief video overview of the Register basics, followed by a comprehensive written outline of the functions.
Running a Transaction
Register Functions
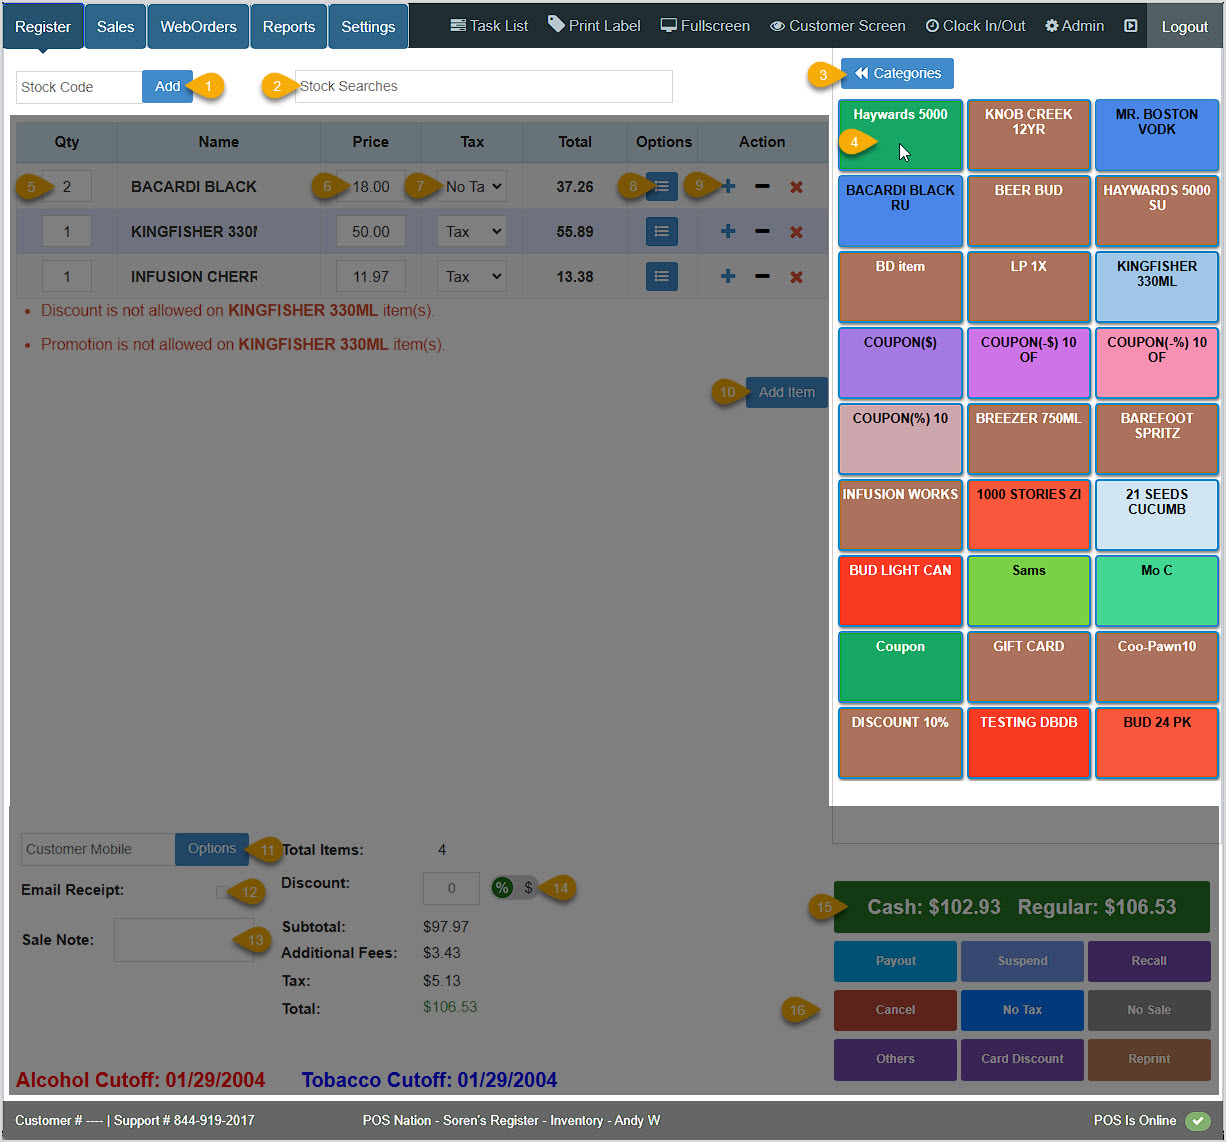
We have separated the major areas of the Register screen for this outline and provided descriptions of how you can use each section.
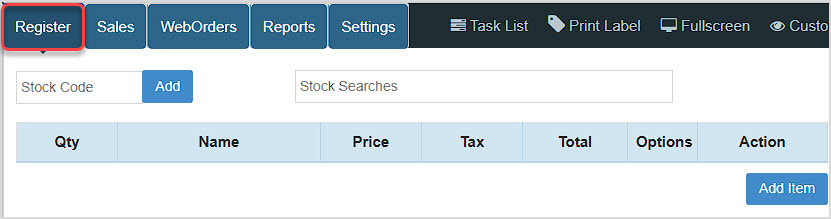
Searches and Shortcuts
We'll start with the search areas in the upper part of the screen and the Shortcut Keys in the upper right.
- Stock Code - Scan barcodes into this field, then click Add to load the item into the Register. Scan multiple times to increase quantity. If the barcode is not yet in the system, you'll be prompted to add it. You can also manually enter your Stock Codes.
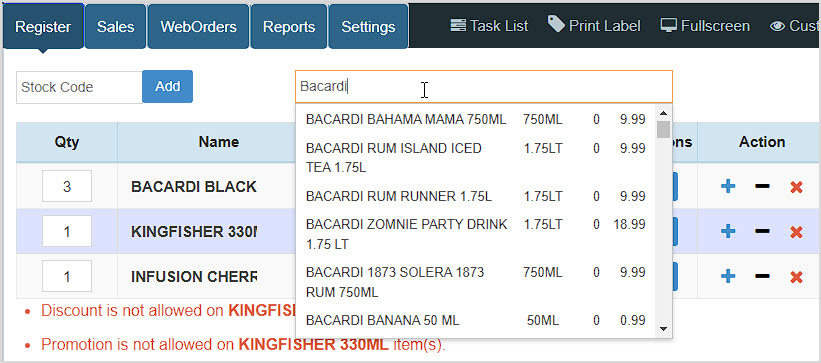
- Stock Search - Enter search text to find what you need and click on one of the search results to load the item into the transaction, as shown below.
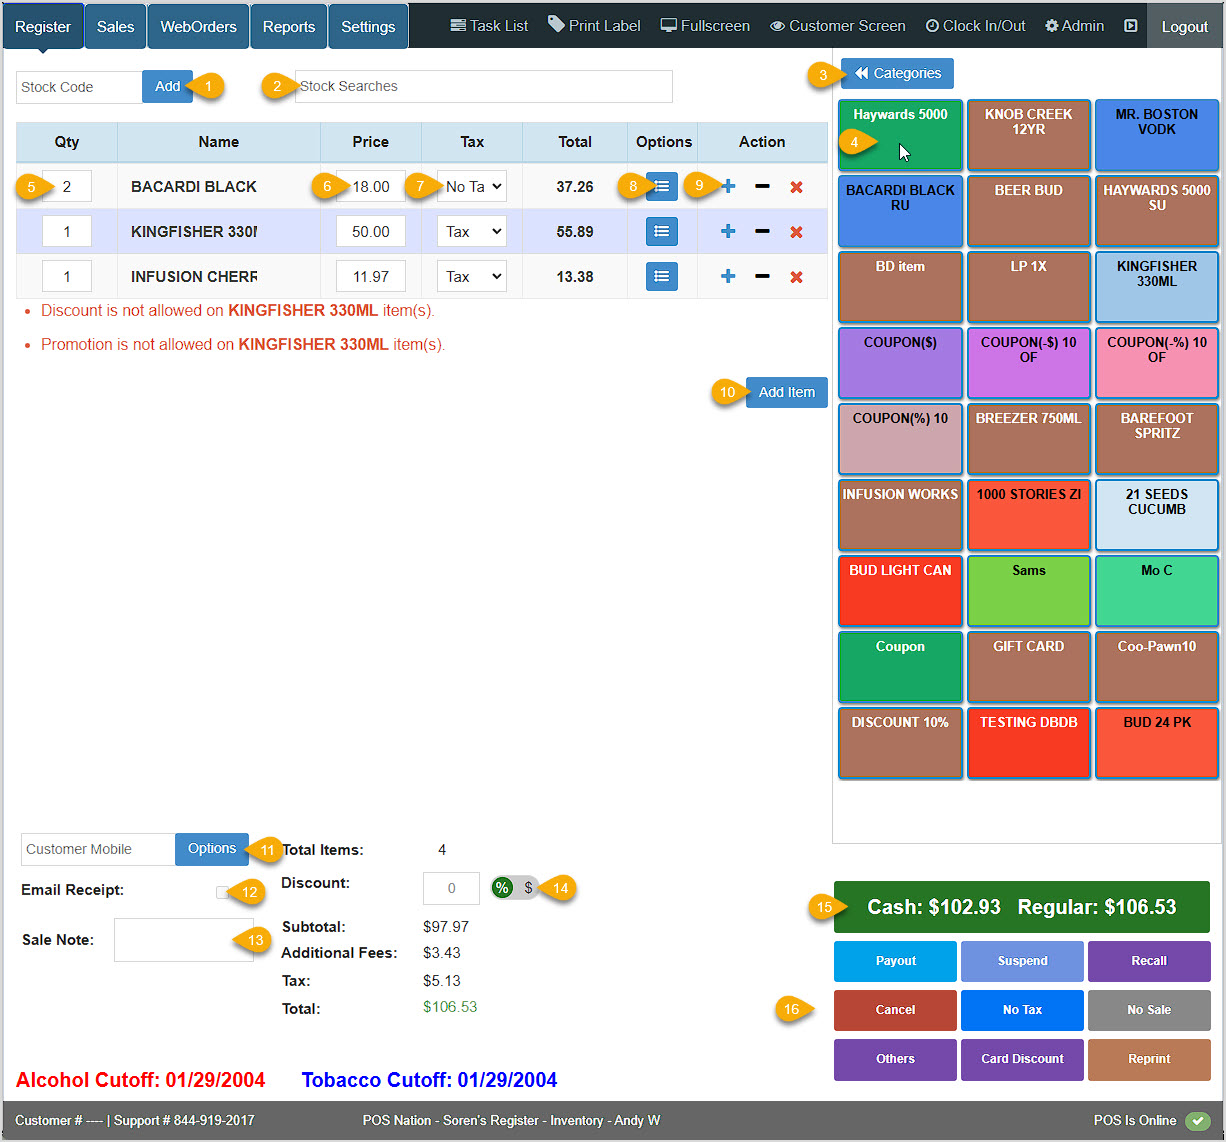
- Categories - Click the Categories button to view any Register Categories you've created, as pictured below. Each will show the number of items it has. Click any button to view the items, each with its own button you can click to add an item to the transaction. Click the Shortcut Keys button in the upper left to return to your standard Shortcut menu.
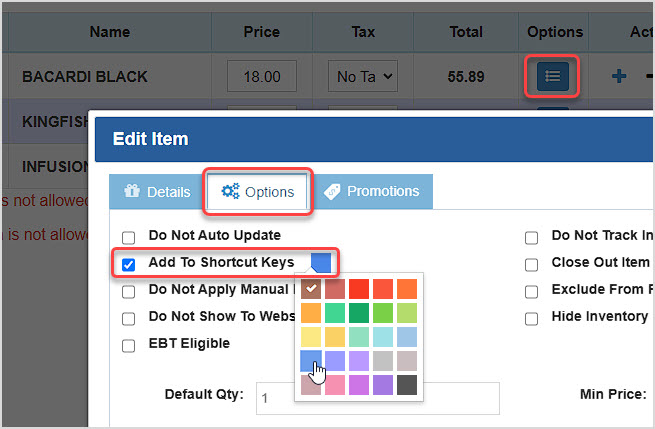
- Shortcut Keys - You can set frequently-purchased items to be Shortcut Key items, allowing you to add them to the Register with a single click. Click multiple times to increase quantity. You can set items this way by clicking the Options button once you've added the item to the sale and the Edit Item window will open. Click the Options tab, and check the box to Add to Shortcut Keys. You can also set the button color, as pictured here. When you're done, click the Update button at the bottom of the window to save the change.
Transaction Items
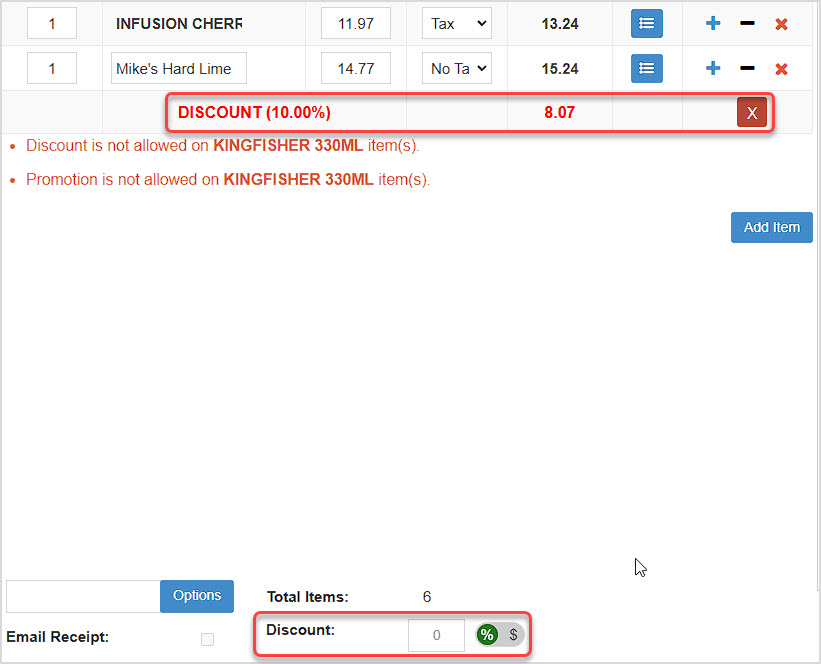
The next area of the Register is where the item details will show up as you scan and add items to the transaction. Please note that details such as Discount and Promotion eligibility will automatically display for items that are not eligible, as in the example below.
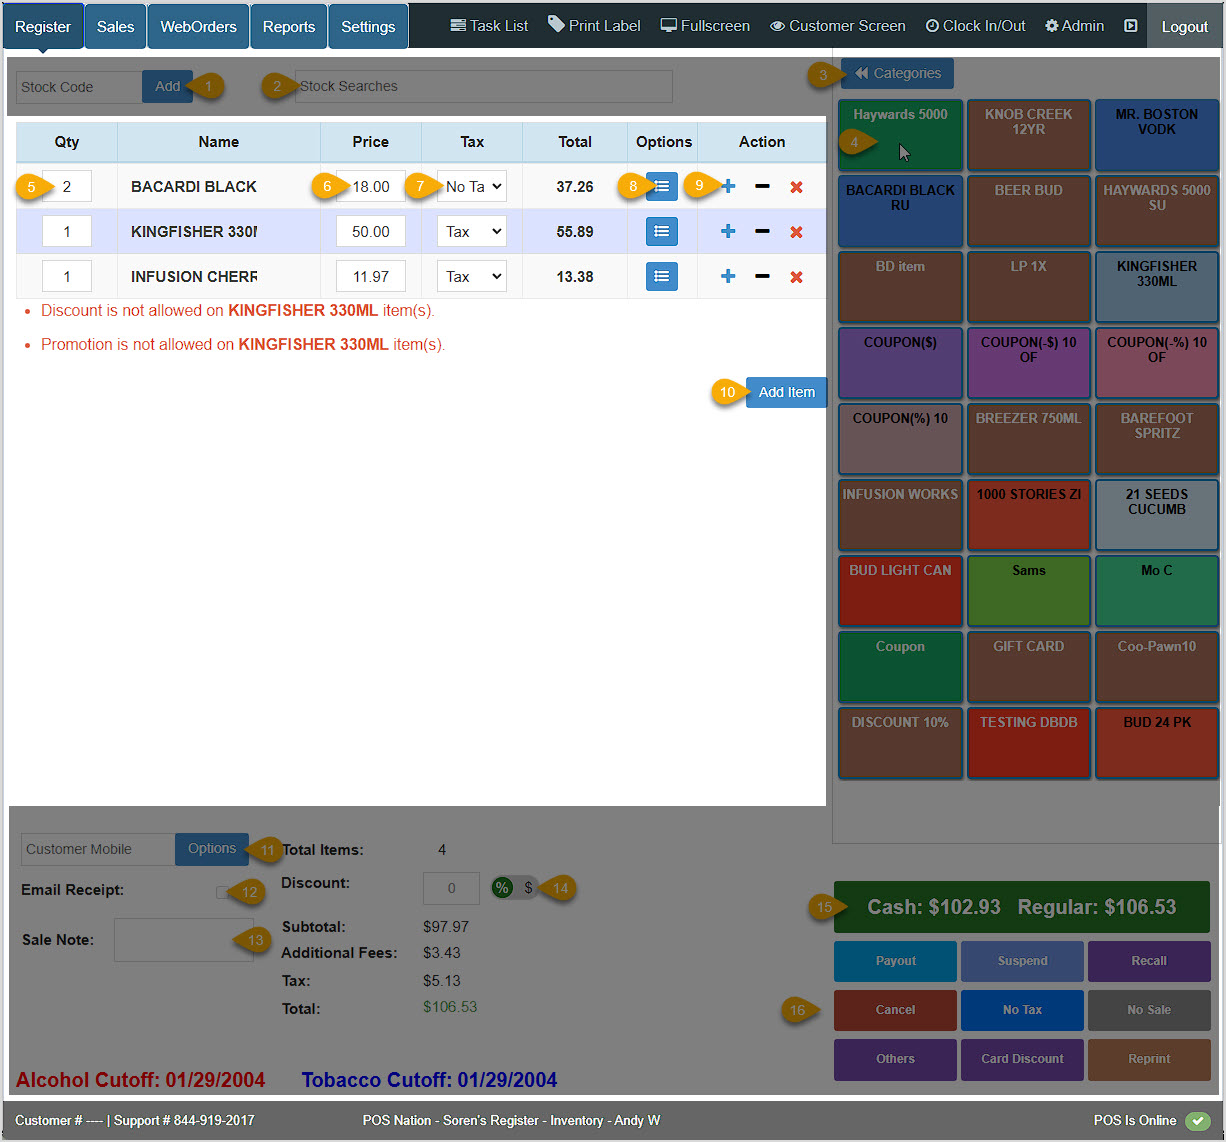
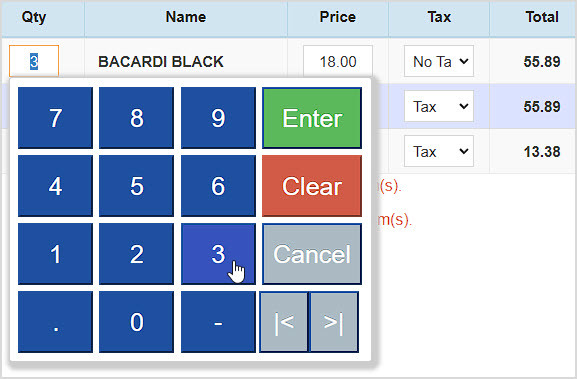
- Quantity - The number of units of the item. You can click this field to manually enter a quantity. This works with your keyboard or mouse.
- Price - If you have permission, you are able to edit the per-unit Price as needed.
- Tax - The default Tax saved for the item will be applied when you load the item, but you can change it with this drop-list if needed.
- Options - Click this button to view or edit full item Details, Options, and Promotions. You can adjust any of the information if you have permission, then click the Update button to save the changes.
- Actions - Add or Reduce the item's Quantity with the + and - icons, or Remove the line item from the transaction with the X icon.
- Add Item - Click the Add Item button to add an item that has not been saved to the system. An empty line will load as pictured below. You will need to add the Name and Price. Be sure to set the Quantity and Tax you need.
Please Note: Manual Entry does not save the items to the database, but you can click the Options button for the line item and save it to the database with the steps above.
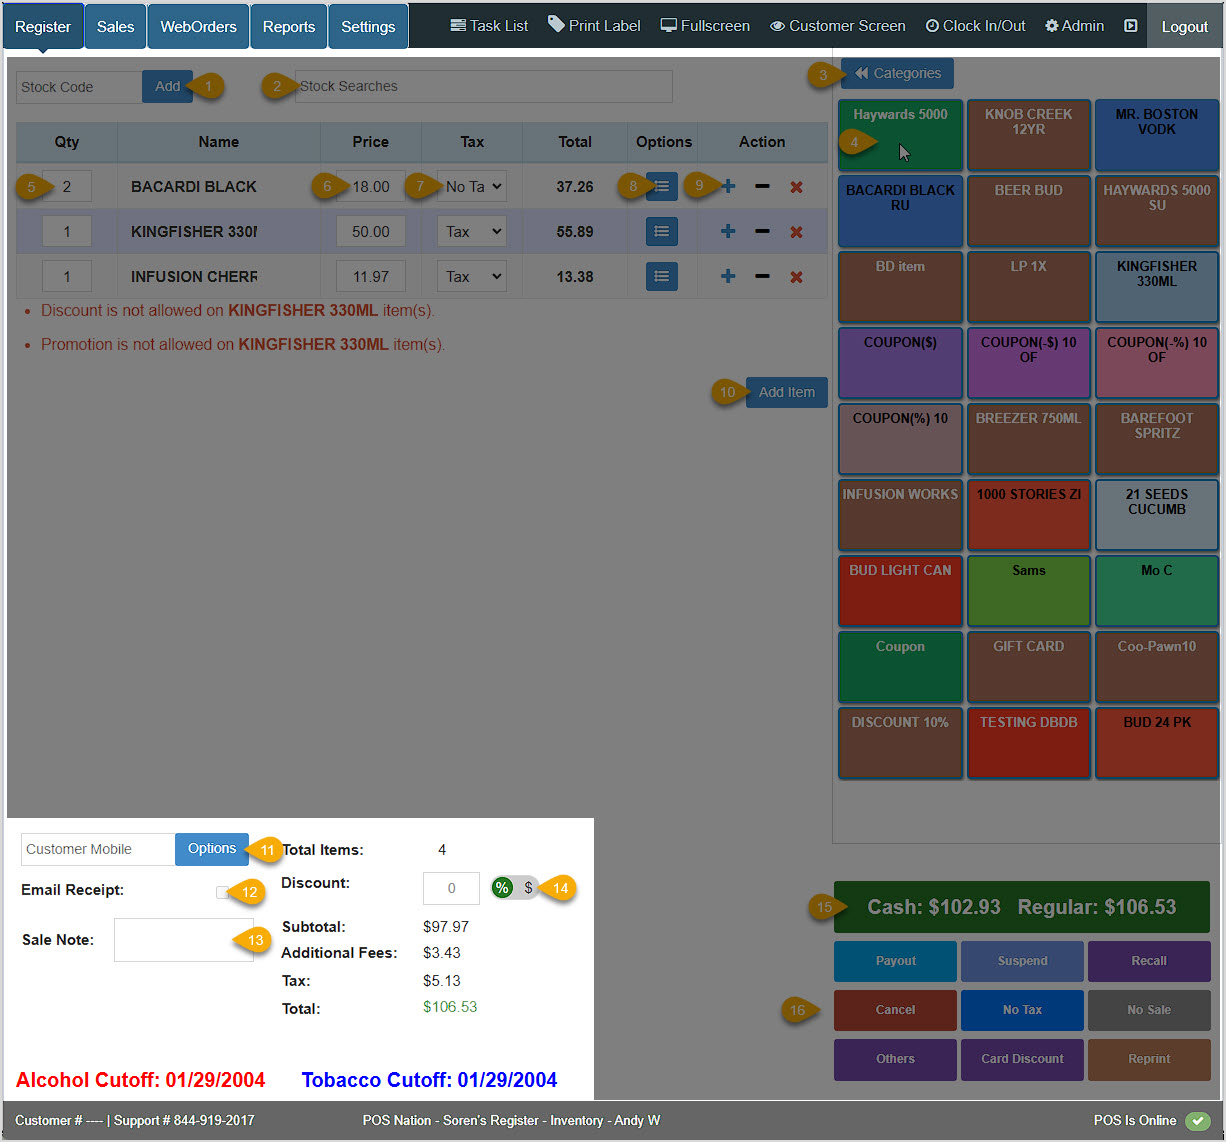
Transaction Summary
The next Register area is the lower left, where you'll see a summary of totals and some critical functions such as adding a customer and any discounts.
- Customer Mobile - Enter the customer's mobile number to add them to the transaction. Either enter the full number and click or press Enter. If you enter part of the number and the system finds matches you can click on one to load the customer.If they are not saved in the system or if you click the Options button, you can create a new customer.
- Email Receipt - If you have loaded a customer in the transaction, and if their email address is saved in the database, check this box to automatically email them a copy of the receipt.
- Sale Note - Enter whatever information you need. The note will print and/or email on the final receipt.
- Discount - You can apply either a percentage discount or a dollar amount off the transaction using this area. In the example below, we entered a 10% discount, and the Register applied that to all eligible items. You can remove discounts using the X button.
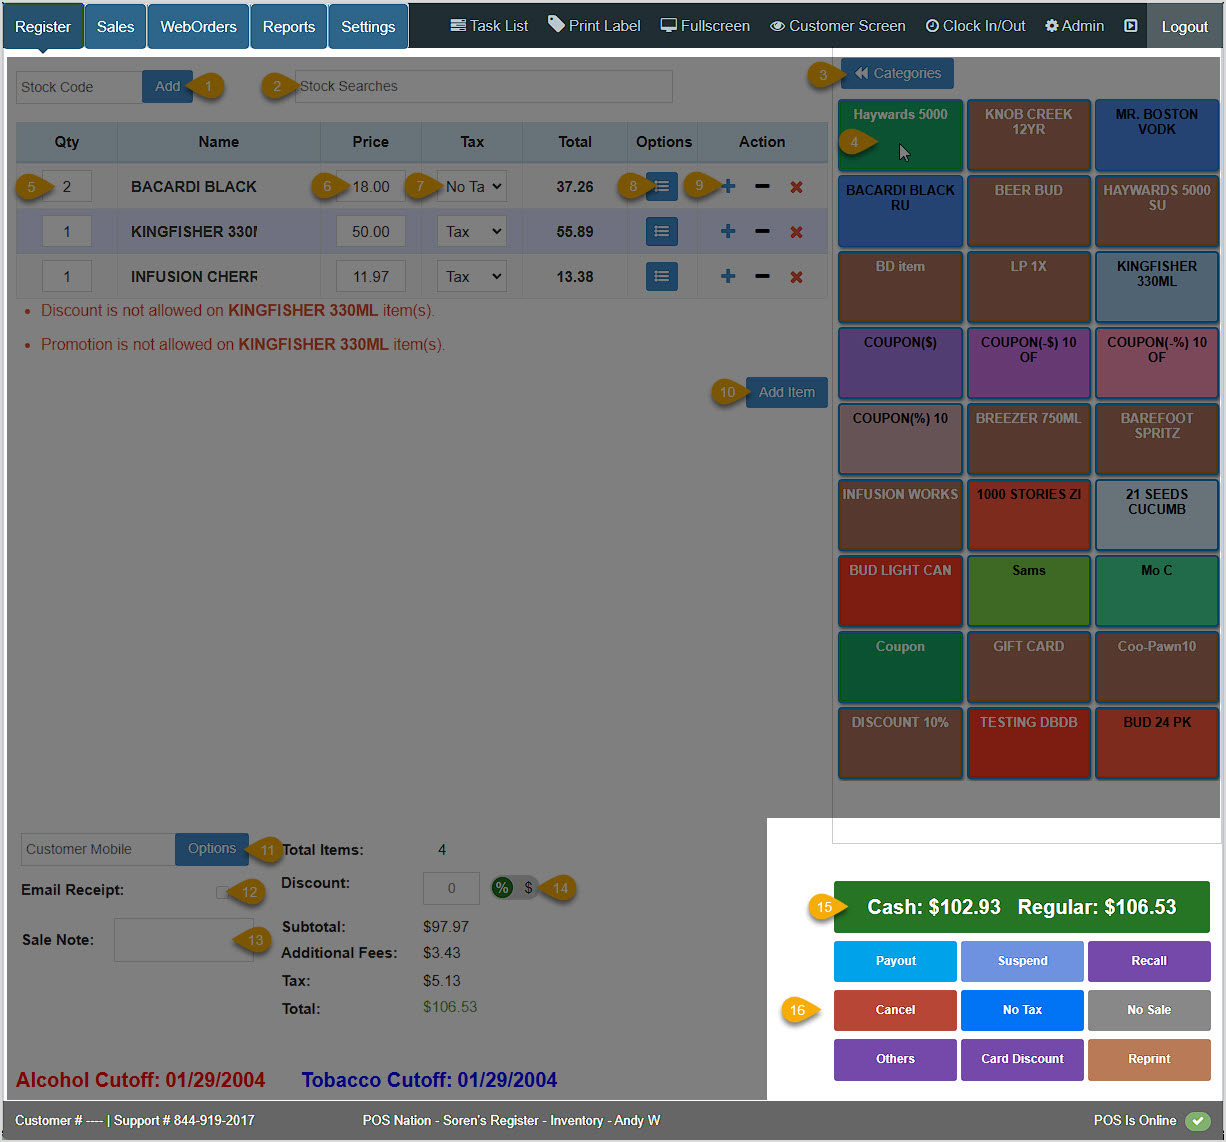
Transaction Functions
The lower right of the Register is where you complete transactions. There are also some important register action Hotkeys detailed for you below.
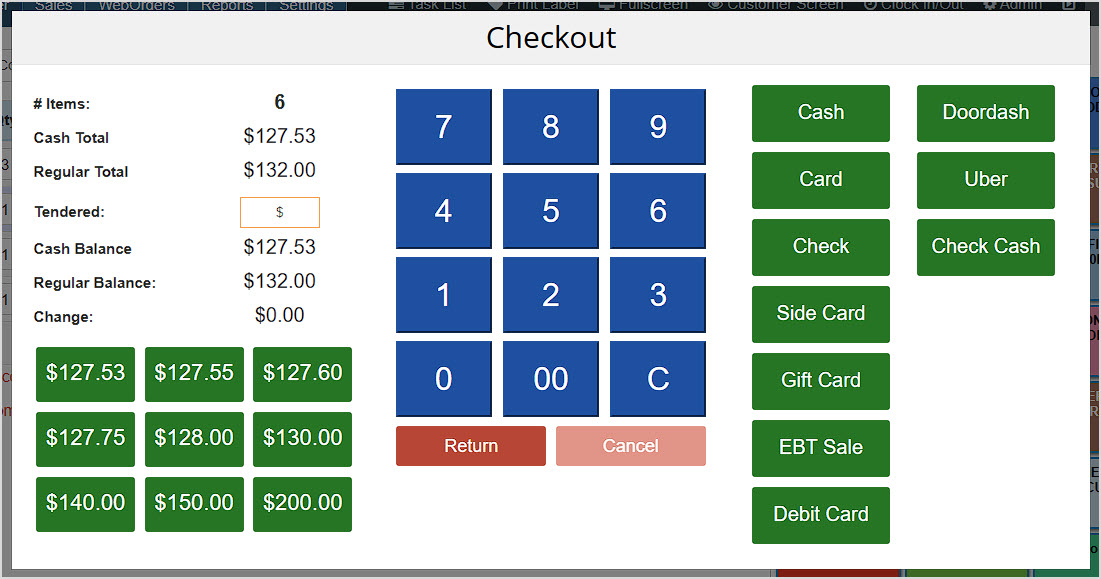
- Complete Transaction - You can Check Out using this button. The example store has Dual Pricing configured, so we can see the amounts for Cash and Card on the Checkout button. Click the button to open the Checkout window. In the image below, we can see cash amounts the customer might want to use in the lower left. Other forms of payment Tender are listed on the right. You can enter a partial amount in the Tendered field and click on a payment method to do a partial payment, and you can repeat that process if the customer is paying multiple ways. The cash amount buttons will recalculate as partial payments are made.
- Register Hotkeys - Several options are available to you for different actions in the Register:
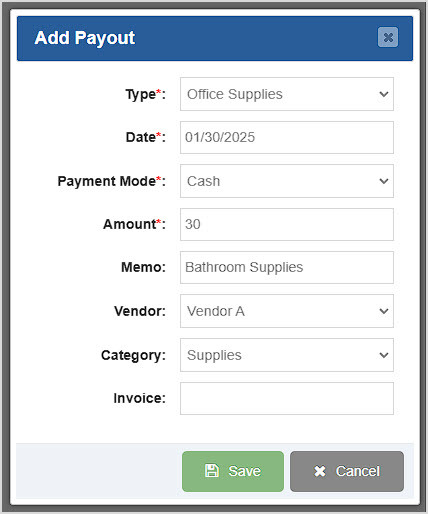
- Payout - For daily expenses that require payout from the cash drawer, you can click the Payout button and the Add Payout window will open to allow you to document the payout details, as pictured here. The Type, Vendor, and Category are all items that are set up in the Admin App and when you click to open those drop-lists you'll see items you've created for those areas from which you can choose. You can enter the Date (it defaults to the current day), the Payment Mode (Cash (default), Check, Card, ETF, or Other), the Amount, and a Memo noting what the payout is for. There is also a field where you can enter an Invoice number, if you need.
- Suspend - If you need to pause a transaction so a customer can go get their wallet or whatever is needed, click the Suspend button. You can Recall the most recently suspended transaction.
- Recall - Click the Recall button to reload full details for the most recently suspended transaction only. You cannot recall others from the Register, but you can access older suspended transactions from the Sales tab.
- Cancel - Click the Cancel button to abort the transaction. Click Yes in the popup confirmation window to clear the Register.
- No Tax - Click the No Tax button and every item you add to the Register while the No Tax button is active will use the No Tax rule. When clicked, the button will stay highlighted while this is in effect, and applies only to the current transaction.
- No Sale - If you need to open the cash drawer but you're not doing a transaction, the No Sale button will trigger the drawer to open. Your receipt printer will print a ticket for the No Sale event, and the event will be logged in the Admin.
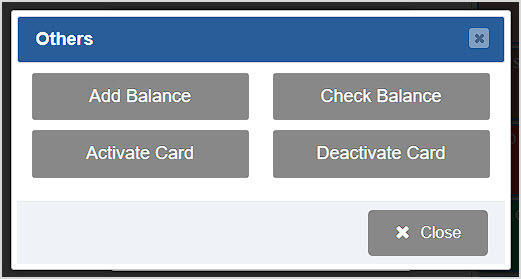
- Others - Click the Others button to open a window with Gift Card functions. You can click the Add Balance button to load or reload a Gift Card with funds. Click the Check Balance button to see the balance of a Gift Card. You can also click buttons to Activate Card or Deactivate Card, as needed. When you're finished, click the Close button to close the window.
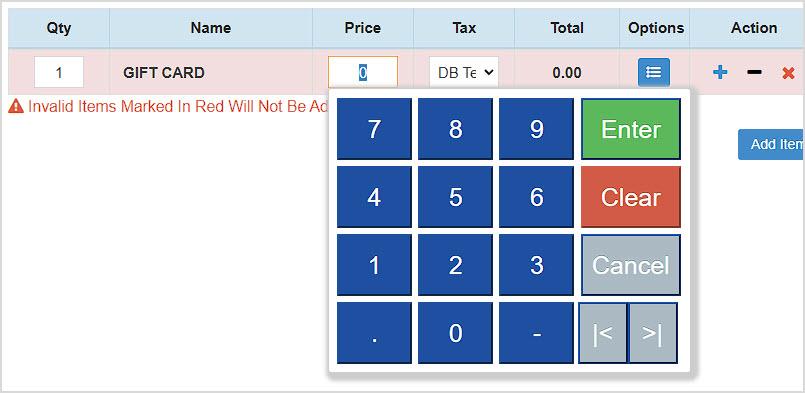
Pictured here is the line item created when clicking Add Balance:
- Card Discount - Click the Card Discount button to turn Dual Pricing on or off in the Register for Cash or Card. When off, the button will stay highlighted and you will see only the Card pricing with no discounted dual Cash price displayed.
- Reprint - Click the Reprint button to print the latest completed or canceled transaction receipt.
Register Footer

The footer area of the Register displays some important information:
- If you have configured your Alcohol Cutoff and Tobacco Cutoff ages, the appropriate birth dates to check for will display here at all times based on how you've configured your legal age limits in the Admin App.
- In the lower left, you can always find your Customer Number and our Support team's contact phone number. You'll need your customer number for reference when working with Support.
- Next you'll see your company name, the device you're using, your inventory Location in the system, and the sales clerk's username.
- Finally, in the lower right is a Status indicator for the system itself. It will be Online except if there's a rare service outage. If it should somehow go Offline you can call support and find out an estimate of when it will be back up and running.
Related Topics
How to Clock In & Out
Adding a New Item in the Register
How to Run EBT Transactions in the POS
How to Process a Return
Closing Drawer Count
Register Hotkeys
How to Take Card Payments Without Internet Using the MX Merchant Express App
Frequently Asked Questions
Q: How do I search for past transactions?
A: You can find past transactions on the Sales tab of the POS. For more information on the specifics, feel free to review the following article: How to Find Transactions
Q: How can I make new accounts for my employees in the Register?
A: Full details on adding new Staff Member user accounts in the POS are in the article linked here: How to Add Employees - Staff & Admins Settings
Q: How do I run reports on my sales?
A: Please review the following article for more information on how to run reports in the POS. Guide to the POS Reports
Q: Why does my closing drawer count report not tell me if the till was over, short, or even?
A: The Register uses a "Blind" drawer count system: the over, short, or even status of a drawer report can only be seen by user accounts with the appropriate permission level. Review the article linked above titled Closing Drawer Count.
Q: I have a question, but I can't find my answer here, how do I get more assistance?
A: You can ask any question at the number below. Contact our 24/7 support team at: (877) 381-4087
 October 01, 2024
Is this page helpful?
×Help us improve our articles