Adding your Suppliers, also known as vendors, to the database will allow you to order new products. The information you add will be used in your reports and purchase orders. Get started, it's simple!
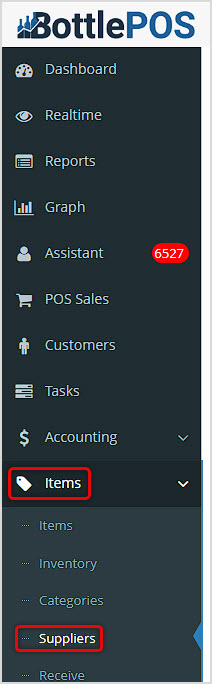
You can get to this part of the system by logging into your Admin app and clicking Items on the left. Near the top of the menu that opens, click on Suppliers.
Working With Your Suppliers
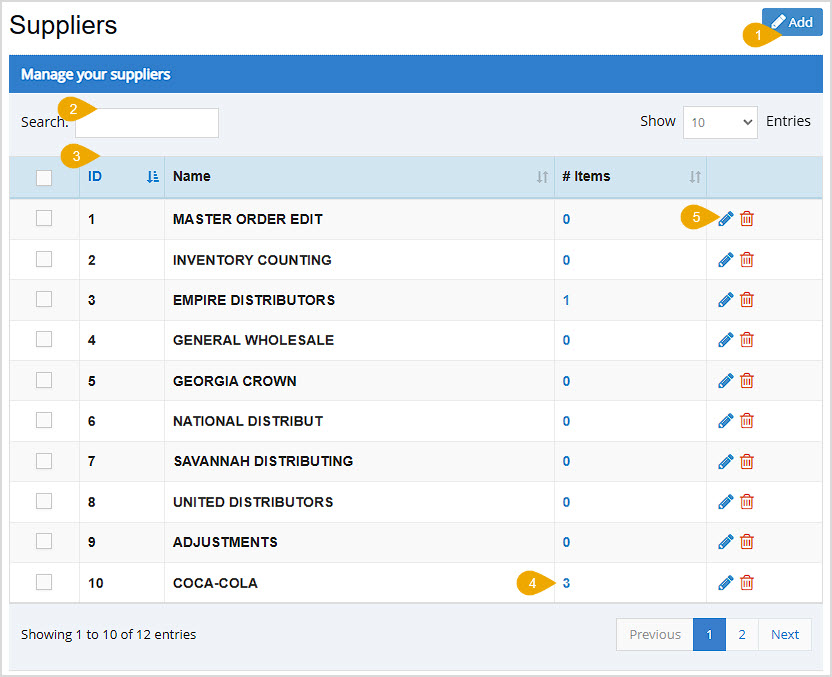
On your Suppliers page, you can set up everything you need to order from your vendors. Here are the page features:
- Add - Click the Add button to add a new Supplier to your database. You'll be able to enter the following data points for each vendor. Once you've finished be sure to click Save at the bottom:
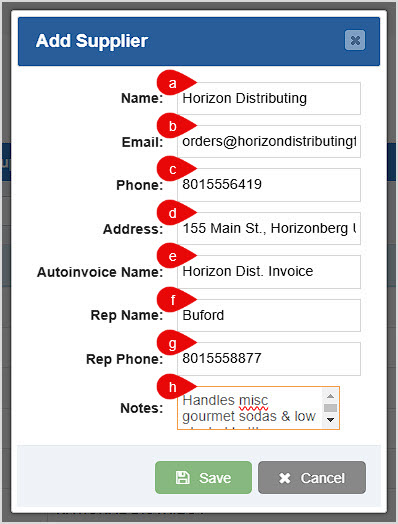
- Name - Enter the vendor company Name. This is the only required field to save a new Supplier.
- Email - Enter the email address your supplier uses to receive order requests.
- Phone - If needed, enter the main contact phone number of the vendor.
- Address - Enter the freight loading address of your supplier.
- Autoinvoice Name - If you use the auto-invoicing integration with Fintech, you need to enter the exact Supplier name from your Fintech portal in order for auto-invoicing to work for the Supplier.
- Rep Name - Enter the name of your main contact point or representative for this supplier.
- Rep Phone - Provide the phone number of your main contact point or representative for this supplier.
- Notes - Enter any special notes relating to this supplier.
Click the Save button when you are finished.
- Search - You can Search by keyword for the supplier names.
- Data Table - The Data Table for your Suppliers has the following columns: Checkboxes (currently not used), ID (this is a simple number the system assigns as Suppliers are added to the database), Name, Number of Items, and Tools. The last three functions are described in more detail below. You can click the column headers to Sort or click again to reverse-sort.
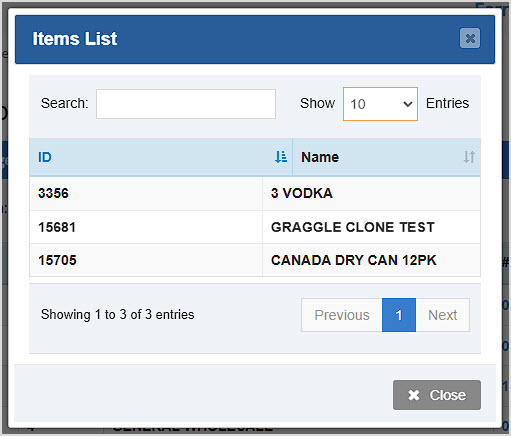
- Items List - You can click any of the numbers in the Number of Items column to open an Items List window that lists the Item ID and Name of each. If it's a long list, you can Search by ID or Name to find what you want.
- Actions - You can use these for each Supplier in your list:
- Pencil Icon - You can click this to Edit the Supplier information shown above whenever you need. The Edit Supplier window will open and has the exact functionality of the Add Supplier window described above.
- Trashcan Icon - If needed, you can click this to Delete the Supplier. You will be asked to confirm that you really want it deleted. Items associated with the Supplier will no longer list a supplier in that field.
How to Set the Suppliers for Your Items
To set up the Supplier you use for an item, in the Admin menu on the right, click on Items, and in the menu that opens click on Items.
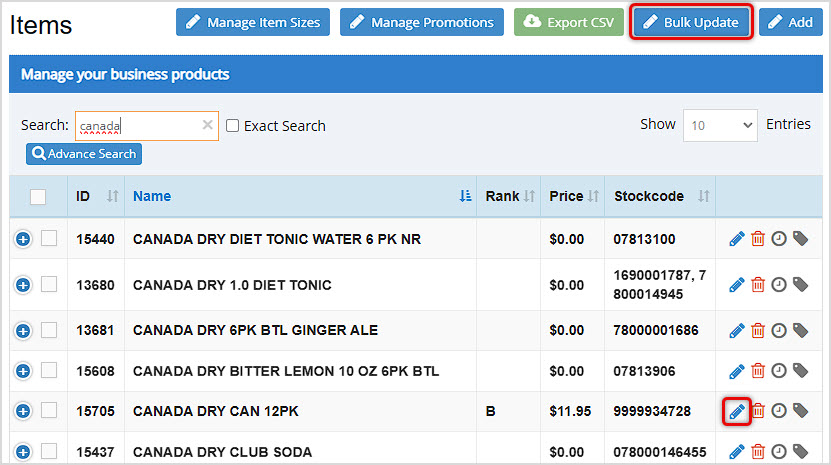
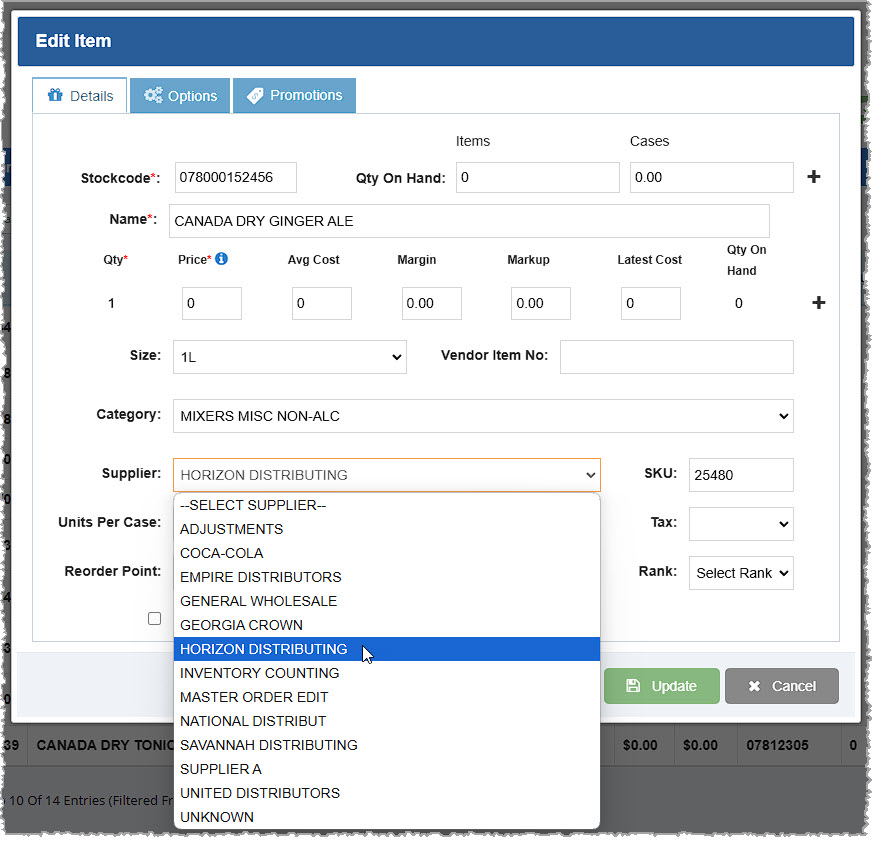
You can set an individual Item's Supplier by clicking on the Pencil Icon on the far right. The Edit Item window will open and in the Supplier drop-list you can select the vendor you want. Click Update when you are finished and the Supplier will update for the Item.
Set Suppliers for Items in Bulk
On the Items page, click the Bulk Update button in the upper right to work with multiple items at once:
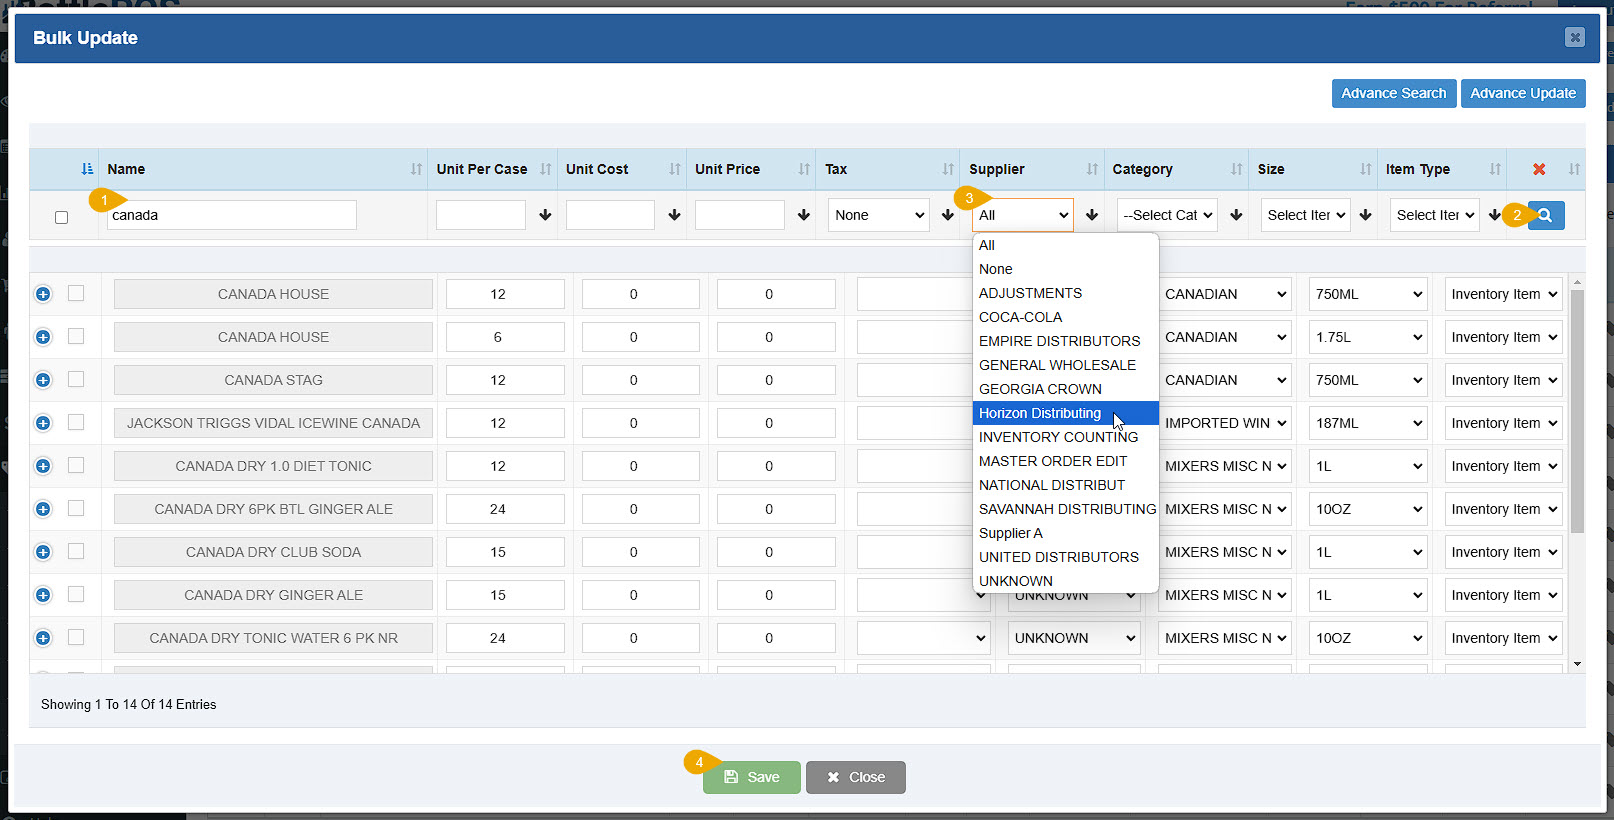
- Filter for Items - Using the main Bulk Update window, you can search by keyword or by any of the column data for the Items you need. For example, if you need to update the Supplier for every Canada Dry Item, you can search Name for Canada Dry, or if you have all of them in a Category, you can click the Category drop-list and select the one you need. You can also set multiple filters, if needed. For example, if you only want the Inventory Items in the filtered Category, you can click the drop-list for Item Type and select that type, and when you apply the filters in the next step, both will apply. You can also use the Advance Search to find items by a wide variety of data points.
- Apply the Filter - Click the Magnifying Glass button to apply whatever filters you have set and the data table will load those items.
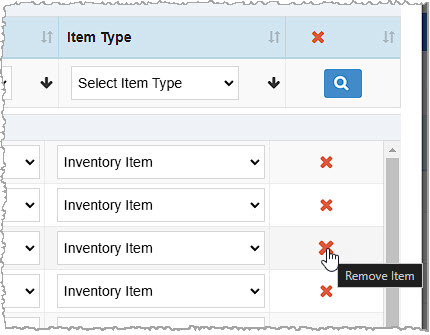
- Set the Supplier - Look through the list and make sure each Item will be using the Supplier. Any you see that don't use the Supplier you can Remove from the filtered list by clicking the X button on the far right of the line item. This does not delete the item from the database, it just removes it from this working list.
Once you have everything you need, at the top of the Supplier column, click the drop-list and select the Supplier you want, then click the Arrow button to set the selected Supplier for all of the items.
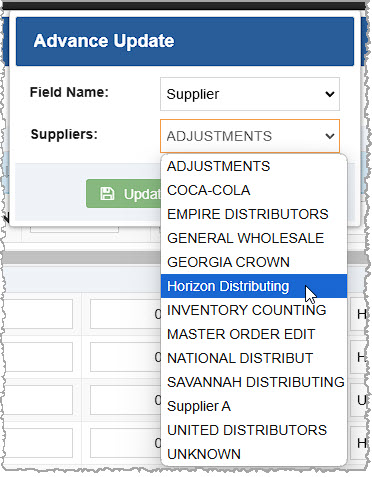
If you don't check any boxes, all items will be auto-selected for the update. You can click the Advance Update button in the upper right. In the window that opens, you can choose Supplier from the drop-list for Field Name. The window will populate the Suppliers field, and you can set the Supplier you want, click Update, then click the Save button in the Bulk Update window and the Supplier will be set for all filtered items.
- Save - You can apply further bulk edits if needed. When you're finished, click the Save button. You'll see your update in the main Items data table right away.
Related Topics
Manage Items Page
How to Add an Inventory Item
Inventory Bulk Updater
Frequently Asked Questions
Q: Can I set the Supplier in the Register?
A: Yes! After you load the item into the Register, click its Options button to open the Edit Item window and you can click to set the Supplier, then click Update to save the change. The POS will pop up a confirmation that the item was updated.
Q: What field do I use to store my account number for my supplier?
A: We recommend using the "Notes" field in the Add / Edit Supplier window for any extra information you wish to store.
Q: Do I need to use Suppliers in my ?
A: Suppliers are not required for use in your , though it is extremely important for proper inventory ordering and tracking.
Q: How many suppliers can I add to my ?
A: There is no limit to the number of suppliers you can add to your .
Q: I have a question, but I can't find my answer here, how do I get more assistance?
A: You can ask any question at the number below. Contact our 24/7 support team at: (877) 381-4087
 October 01, 2024
Is this page helpful?
×Help us improve our articles