Keeping track of inventory and stock levels is an important part of any business. Your Bottle POS has all of the tools you need to store the points of data you need for your items. This article will review how to add items, how to associate your items with vendors and departments, and how to prepare your inventory for reordering.
Adding Items in the Bottle POS Admin
Add Item Sizes
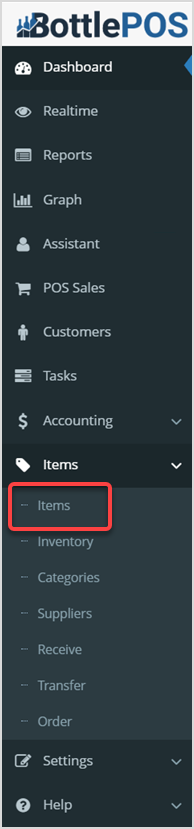
To begin working with your Items, log into your Admin. Click Items on the left-hand side of your Admin screen. After the menu expands, select Items, as highlighted above. The Items page will load.
Before you start adding your items to the database, we recommend identifying some common Sizes that your products are sold in. This will help organize your reports and also enable you to run size specific promotions.

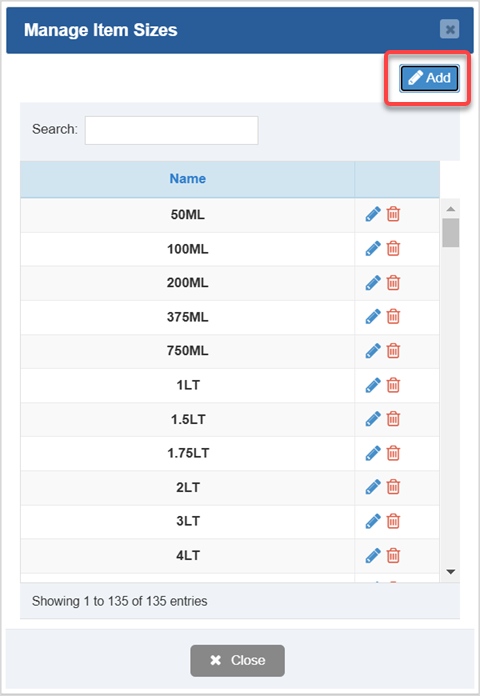
- Click the Manage Item Sizes button. The Manage Item Sizes window will open for you.
- Click the Add button in the upper right to create a new item size. The Add Item Size window will open for you.
- Type in the Name of the new item size. For example, 6 pk, 12 pk, 375ML.
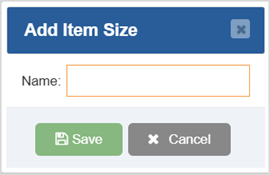
- Click the Save button to add the new item size
- Repeat as needed, click Close when finished.
Adding Inventory Items
When you need to work with items you have already saved to the system, utilize the Search area or Advance Search, then when you've found what you want, use the Action buttons on the right:
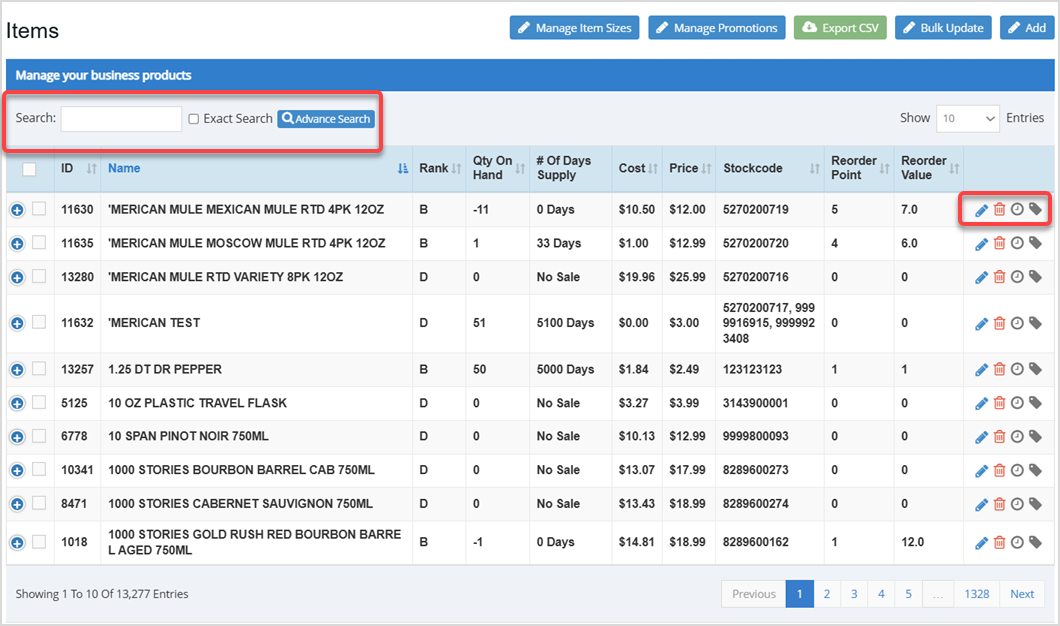
Now you can begin adding items to the POS database. On the Items page, click the Add button in the upper right. The Add Item window will open.

The Add Item Details Tab
In the Details tab you can enter key information about the item. Fields with a red asterisk* are required in order to save the item.
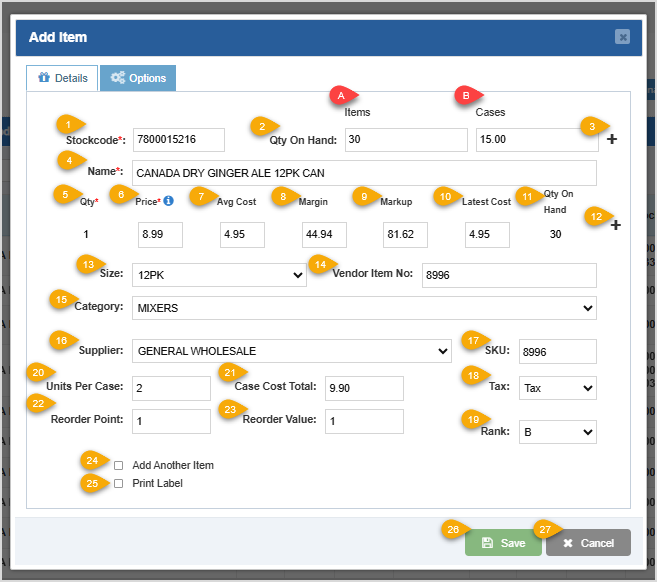
- Stockcode - Scan the barcode of your item here, or simply type in the Universal Product Code (UPC). If the UPC already exists in our Cloud Database, the software will automatically fill in common details. If you don't have a UPC or barcode, click the Barcode Icon next to this field (not pictured) and the software will automatically generate one.
- Qty on Hand - This field is used to record the current count of the item you have on hand.
- Items - Input the number of individual units in stock. This field will dynamically update when you specify a value in the Units Per Case field.
- Case - Input the number of cases in stock. This field will dynamically update when you specify a value in the Units Per Case field.
- Plus Icon - Click this button to add quantity to the item.
- Name - This field is used to Name the item in your inventory. This field will print out on the receipt in the same exact format you use. No need to worry about capitalization, as the POS will automatically convert all names.
- Qty - This displays the breakdown of an individual bottle for the item. Clicking the Plus icon, described below, will allow you to enter in another quantity breakdown of your choosing.
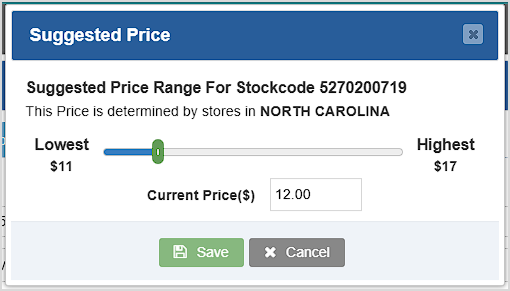
- Price - Fill in the Price for which you will sell this item. You can click the (i) icon to open the Suggested Price window, which gives you regional information on lowest to highest pricing and where your current Price fits. You can drag the slider or enter the value you want for your Price, then click the Save button to set the amount.
- Avg Cost - This field displays your average Cost per unit over the life of the item.
- Margin - This field shows the percentage profit Margin of your pricing. If you enter a percentage, the Price and Markup will adjust to reflect the new margin. This field is calculated by the following formula: Margin = (Price - Cost) / Price
- Markup - This field displays the percentage Markup of the price compared to your cost. You can enter a percentage here and your Price and Margin will adjust to reflect the new markup. This field is calculated by the following formula: Markup = (Price - Cost) / Cost
- Latest Cost - This field displays the most recent Cost you paid for the item.
- Qty On Hand - This field displays the number of individual items you have on hand based on the Quantity from number 5 above.
- Plus Icon - By clicking this button, you can enter another quantity breakdown if necessary. For example, if you sell 4-packs of the item, you could create a breakdown for pricing and cost information on the item sold in groups of 4.
After filling out the item details, we need to configure the product in other important areas:
- Size - Select the Size of this product. See the section above for Managing Item Sizes.
- Vendor Item Number - If your vendor has an internal part number that is not the same as the UPC, enter that part number here.
- Category - Select the Category for this product.
Having categorized the product, the next step is to add the supplier information for reordering purposes:
- Supplier - Select the primary vendor you order this product from.
- SKU - Utilize this field for an internal Stock Keeping Unit or Item Number.
- Tax - Select the Tax Rule for this item, if different from the default.
- Rank - Your sales over time for the item will allow the system to Rank it, and that will display here. For reference, Rank A is the top 20% of your sales, Rank B is the middle 60% of your sales, Rank C inventory falls into the bottom 20% of your sales, and Rank D inventory has no sales history.
- Units Per Case - Specify the number of individual units per case.
- Case Cost Total - Input the total reorder cost of a case. If you've entered quantity and cost information above, this value will be calculated for you.
- Reorder Point - Set the lower stock limit for when this item will need to be reordered.
- Reorder Value - When at or below the Reorder Point, enter how many units should be ordered.
- Add Another Item - If you check this box, after saving this item, another Add Item window will pop up so you can create your next product.
- Print Label - Check this box to Print this inventory item's label.
- Save - Click this button to Save the information you've entered to your database.
- Cancel - Click this button to close the window without saving any changes you've made.
Add Item Options Tab
The Add Item window's Options tab has tools to help you configure your product in a wide range of areas:
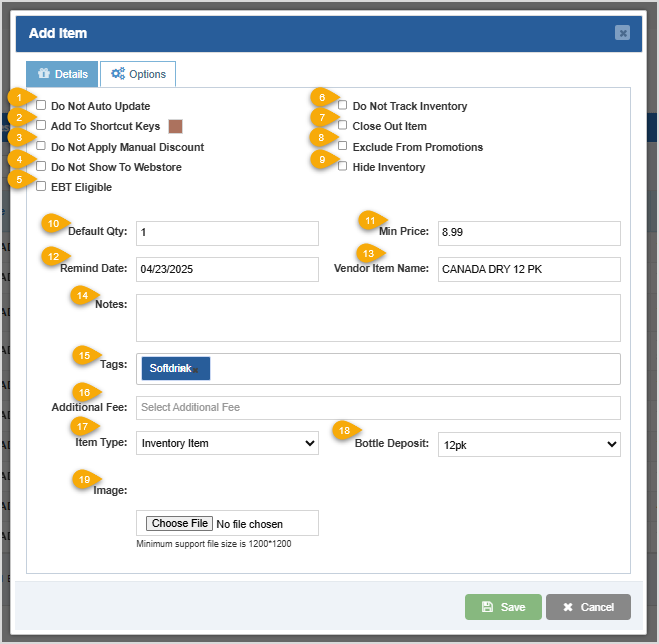
- Do Not Auto Update - Check this box if you want the item to stop tracking Rank and Reorder predictions.
- Add to Shortcut Keys - Check this box to add this item to the shortcut keys. You can change the color of this button in shortcut keys by clicking the colored box next to this feature and selecting the color you want.
- Do Not Apply Manual Discount - Checking this box will prevent discounts from being available for the item.
- Do Not Show To Webstore - Check this box to omit this item from being sold in your webstore.
- EBT Eligible - This checkbox will designate whether or not EBT (food stamps) can be used to purchase this item.
- Do not Track Inventory - This checkbox will omit this item from stock tracking if checked.
- Close Out Item - Checking this will prevent the item from appearing in the Order section when Generate Order is clicked.
- Exclude From Promotions - Checking this box will exclude this item from any promotions.
- Hide Inventory - If you check this box the item's stock on hand will not display in the Register while searching or scanning the item.
Here is what you can do in the lower part of the Options tab:
- Default Qty - Enter a number into this field to set the default quantity to add to a transaction for the item.
- Min Price - Enter a price into this field to set a minimum price that discounts will not be allowed to go below.
- Remind Date - Use this date-picker to choose a date for the assistant to remind you to review the item.
- Vendor Item Name - If your vendor has a unique name for this product, you can provide that in this field.
- Notes - You can use this field for any special information you'd like to record for the item.
- Tags - If you'd like to provide special keywords to use when searching for this item, you can add those in this field.
- Additional Fee - Click this drop-list to view Fees saved in your system, and click on one or more to associate the fee(s) with the item. Doing so will charge the fee each time the item is purchased. Additional Fees are added under Settings > Accounting Settings in the Additional Fees section of the page.
- Item Type - This field will determine how the item is used in the POS. Different item types are assigned to make the items behave differently in the reports, for example a house sale and a coupon type. Note that the default selection is Inventory Item and this is what you'll use for standard items you sell.
- Bottle Deposit - This field will add the selected Bottle Deposit fee onto the price of the item. This field only appears if Bottle Deposit is active in the POS, so this may not be visible to you. The Bottle Deposit fees are added in Settings > Accounting Settings in the Bottle Deposit section.
- Image - Click the Choose File button to upload an Image for item. JPEG or PNG images sized to 1,200px on each side are best. Your webstore will display the image for your online customers.
Related Topics
Adding an Item from the Register
Inventory Bulk Updater
How to Transfer Items Between Your Stores
How to Manage Suppliers
How to Manage Categories
How to Set Up Sales Tax
Frequently Asked Questions
Q: How many items can I add to the database?
A: There is no limit to the amount of items you can store in your POS.
Q: How do I add suppliers to the system?
A: Please review the article linked above for more information on how to add Suppliers.
Q: How do I add item categories to the POS Software?
A: Please review the following article for more information on how to add Categories.
Q: How do I add or modify Tax codes?
A: Please review the following article for more information on how to add Tax information.
Q: I have a question, but I can't find my answer here, how do I get more assistance?
A: You can ask any question at the number below. Contact our 24/7 support team at: (877) 381-4087
 October 01, 2024
Is this page helpful?
×Help us improve our articles