The Transfer Report shows details on transfers made between separate stores and created in the Items > Transfer section of the Admin.
To view the Transfer Report, click on the Reports tab on the left-hand side of your Admin. In the Reports drop-list click the Transfer Report.
Working with the Transfer Report

- Group By – This drop-list allows you to group results by Item, Category, or Invoice.
- Transfer From – This function filters the report to only show transfers that came from the selected store.
- Transfer To – This function filters the report to only show transfers that went to the selected store.
- Range – This automatically populates with the current date and time. If you want a different Date Range, click in the box to select the dates you want.
Transfer Report Item Grouping
The Transfer Report table will default to Group By Item as shown below:
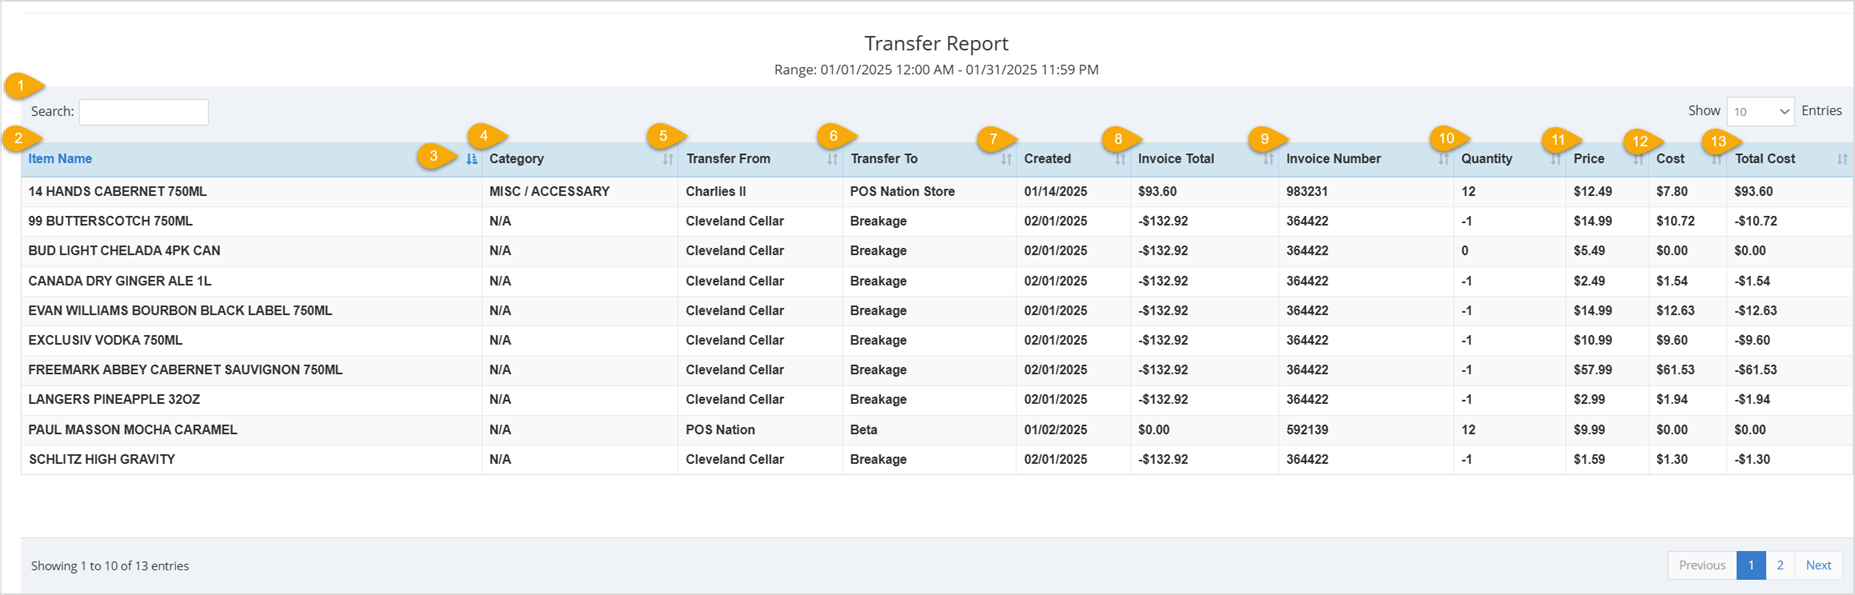
- Search – Enter text into the Search to find a specific user or date and time.
- Item Name – This column displays the name of each item you transferred.
- Sort – In the table, you can click the column headers to sort alphanumerically, or click again to reverse-sort.
- Category – This column displays the category of each item you transferred.
- Transfer From – This column shows the store the items were transferred from.
- Transfer To – This column shows the store the items were transferred to.
- Created – This column displays the date the transfer was created.
- Invoice Total – This column displays the invoice's total dollar amount for each item.
- Invoice Number – This column displays the Invoice Number for each item.
- Quantity – This column shows the Quantity of each item you transferred.
- Price – This column shows the Price of each item you transferred.
- Cost – This column displays the Cost of each item you transferred.
- Total Cost – This column displays the Total Cost of the quantity of each item you transferred.
Transfer Report Category Grouping
The Transfer Report table can also Group By Category. This grouping displays the Category, Transfer From, Transfer To, Invoice Total, Quantity, and Total Cost columns described above.

Transfer Report Invoice Grouping
The Transfer Report table Grouped By Invoice offers useful data. The Invoice grouping has columns for Transfer From, Transfer To, Invoice Number, and Invoice Total that are described above.
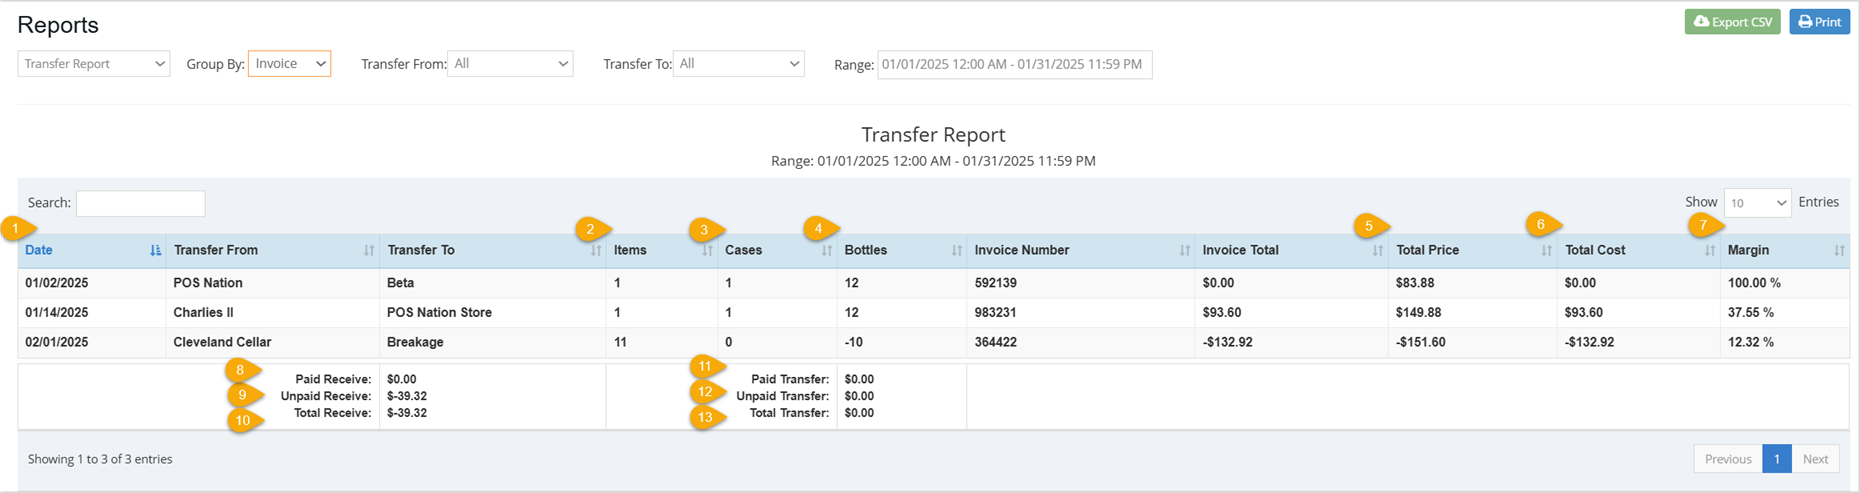
The Report Grouped By Invoice introduces new table components you haven't seen in the previous Group By options:
- Date – This column shows the Date that the invoice was created.
- Items – This column displays the number of Items included in that invoice.
- Cases – This column shows the amount of Cases included in that invoice.
- Bottles – This column shows the amount of Bottles included in that invoice.
- Total Price – This column displays the total dollar amount price of the products in the invoice.
- Total Cost – This column displays the total dollar amount cost of the products in the invoice.
- Margin – This column displays the profit Margin percentage of the transferred inventory.
- Paid Receive – This column shows the dollar amount of the received inventory that has been paid.
- Unpaid Receive – This area shows the dollar amount of the received inventory that has yet to be paid.
- Total Receive – This area shows the total dollar amount of the received inventory.
- Paid Transfer – This area shows the dollar amount of the transferred inventory that has been paid.
- Unpaid Transfer – This area shows the dollar amount of the transferred inventory that has yet to be paid.
- Total Transfer – This area shows the total dollar amount of the transferred inventory.
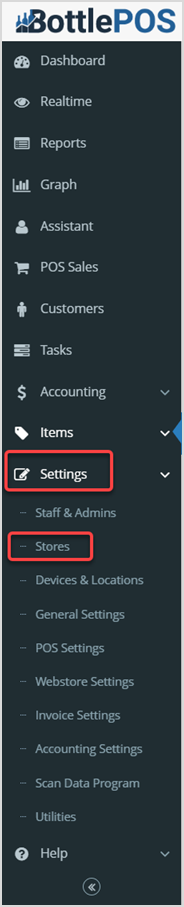
Linking Multiple Stores Together By URL
If you own multiple stores and you aren't seeing one or more of your other stores, keep reading to learn how to link them together in order to implement transfers between them. You can link the stores together by their URLs in the Settings > Stores section to enable features such as transferring inventory.
In the Manage Multiple Stores area you can View, Edit, Add, or Delete your other stores. If you don't see your other stores here, you will need to Add them.

- Click the Add button to add a new store. The Add Store window will pop up and you can add your other store's information.
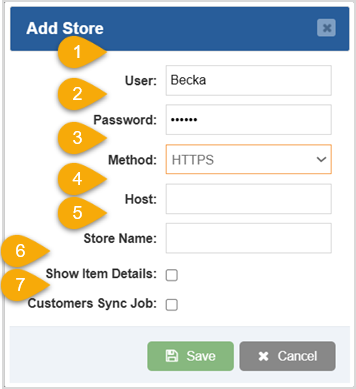
- User – Enter the Admin username for the store.
- Password – Enter the Admin password for the store.
- Method – Leave this set as HTTPS.
- Host – Enter the store URL, for example: storename.bottlepos.com
- Store Name – Enter the name you want the system to use for the store.
- Show Item Details – Check this box for your site to Show Item Details to your other store locations.
- Customers Sync Job – Check this box for your site to sync customers between your other store locations.
Click the Save button when finished in this window.
Related Topics
Guide to the Admin Reports
How to Transfer Items Between Your Stores
How to Create Purchase Orders
Receive Invoices in the Admin
Frequently Asked Questions
Q: Can I print my reports from the Admin?
A: Yes. If you have a printer connected to your device, you can click the Print button on the top right of the report page to print the report you are viewing.
Q: I have a question, but I can't find my answer here, how do I get more assistance?
A: You can ask any question at the number below. Contact our 24/7 support team at: (877) 381-4087
 October 01, 2024
Is this page helpful?
×Help us improve our articles