You can utilize a fully-automated Webstore that integrates with your Bottle POS to work with online orders. Take a look at how you can set it up to work the way you want!
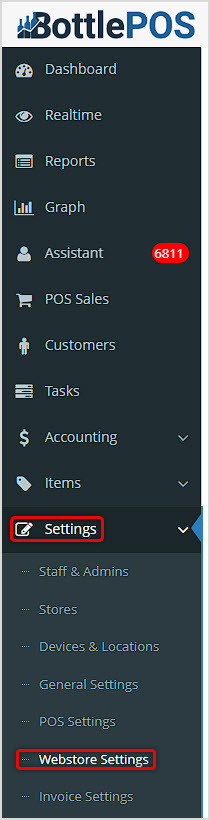
You can get to this part of the system by logging into your Admin and clicking Settings on the left. In the menu that opens, click on Webstore Settings.
Working With Your Webstore Settings
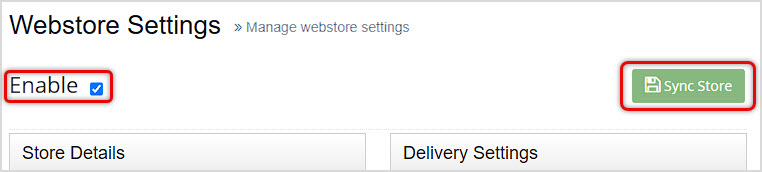
Your Webstore Settings page contains settings that let you configure how your online store will work, how you'll either deliver or accept online orders, and what your Webstore will look like. To begin, at the top of the page, you'll need to make sure your Webstore is enabled using the Enable checkbox. The Sync Store button in the upper right is used by the support team when troubleshooting to update the changes in your Webstore and is not something you will typically need to use.
In this article we'll explore what is there for you. For all areas, remember to scroll to the bottom and click the Save button to finalize any changes you make.
Store Details

The Store Details area is at the top of the left column on the Webstore Settings page. In this area you can configure the following settings:
- Business Name – Enter the Business Name as you want it to appear in your Webstore.
- Business Number – Enter the Business Phone Number you use for customers to call.
- Admin / Info Email – Enter the Business Email you use for customers to contact you.
- Search Address – Enter your Street Address into this search field and it will use Google to find matching results. Click on the one that matches.

When you select the address, the Address, Suburb (City), State, Postcode, Country, and Latitude & Longitude fields will populate. You can adjust these fields manually, if you need. If you have a Unit or Suite number that did not populate in that field, enter it manually.
- Latitude & Longitude – These settings allow your store to be shown in the webstore relative to the customer's location on a map and enable delivery estimates and other online location functions.
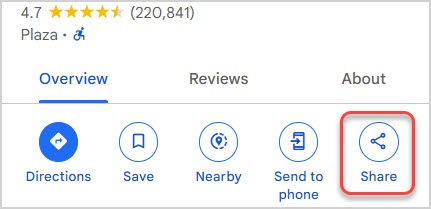
- Map Embed URL – You can copy a Map Embed URL from Google Maps here and your website will use it to offer your online customers a map and driving instructions. Follow the below steps to get the embed URL:
- Open Google Maps.
- Enter the address of the store.
- Click the Share button.
- Click the Embed a Map tab.
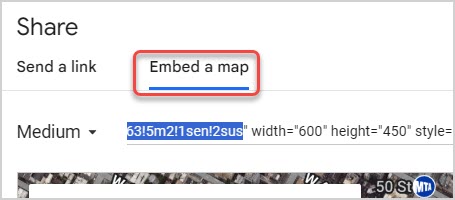
- Copy the URL inside the quotation marks after src=. To make sure you copied the correct part of the URL, verify that the URL begins with https:// and ends with !2sus, as pictured above.
- Paste the URL into the Map Embed URL field of the Webstore Settings section for Store Details in the Bottle POS Admin.
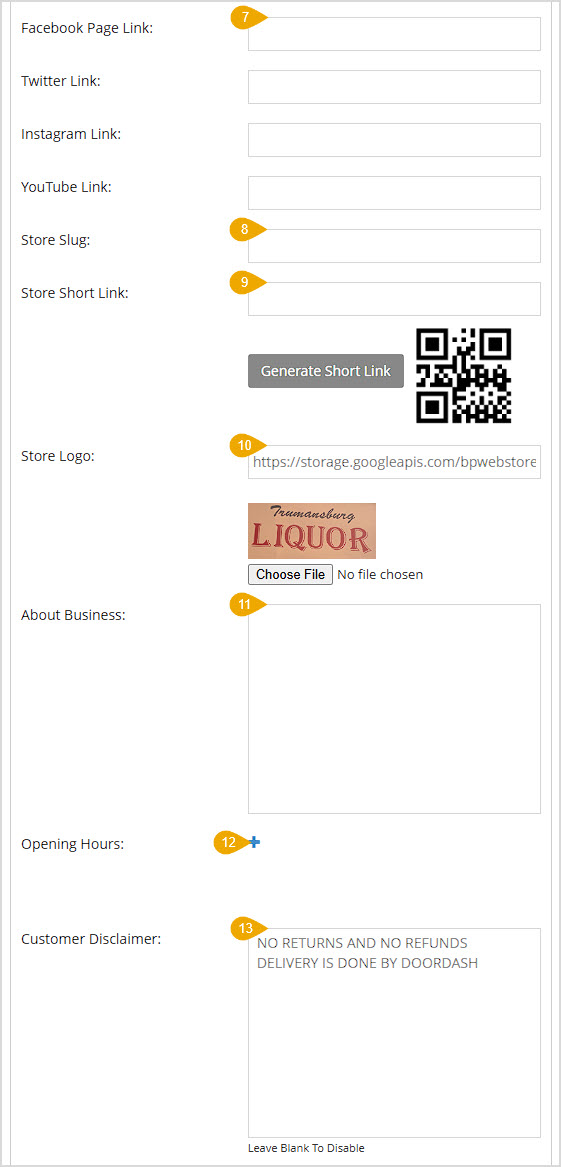
- Social Media Links – You can paste links to your social media pages in these fields and the system will make those links available with the proper logo images to your Webstore visitors. You can enter URLs for Facebook, Twitter (X), Instagram, and YouTube.
- Store Slug – Enter the store name here in the following format (this will be used in the URL for the webstore): bz_yourstorename
- Store Short Link – After you enter your Store Slug, you can click the Generate Short Link button and the system will populate the URL for the shortened link in the field and will provide a QR Code. You can right-click the QR Code image to download it and use it manually as needed.
- Store Logo – You can click the Choose File button to find the image file of your logo you want to use for your Webstore. After you choose the file, you'll see a thumbnail of the image and the URL for its source hosting. This is a feature that is available only if you have the Bottlezoo Premium feature. For pricing and setup of this feature, please contact support and we'll be happy to help.
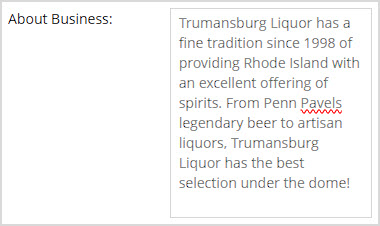
- About Business – Enter paragraph text to inform your online customers about your selection of items, your service, and any interesting information about your business! You can enter any amount of text, but a short paragraph with your most impactful main points is good.
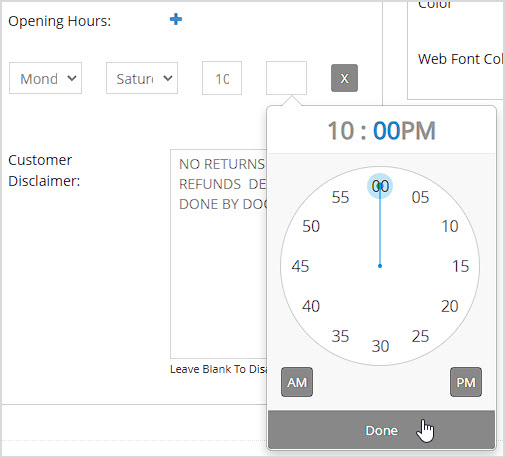
- Opening Hours – Click the Plus icon to add your operating hours. Use the drop-lists to set the Day(s), then click in the Time fields to open the From Time and To Time clock windows to set the hours for the selected day(s). You can enter text into the Time fields, or use the controls on the clock and click Done when the time is set the way you want. You can click the Plus icon to add more lines if some days have different hours than others. You may enter as many new lines as you need.
- Customer Disclaimer – For your Webstore customers, if you want to display a disclaimer at checkout for them regarding your policies like the one pictured above, you can enter the text you want here.
Delivery Settings
The Delivery Settings area is at the top of the right column on the Webstore Settings page. In this area you can configure the following settings:
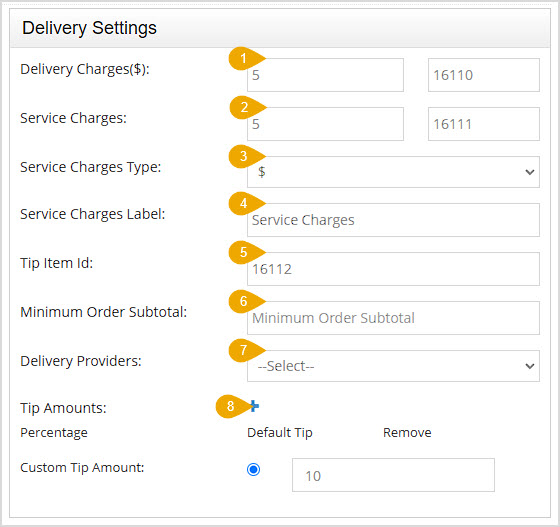
- Delivery Charges – You can use this area to set up the base Delivery charge amount added to your deliveries. In the first field, enter the Dollar Amount of the fee. The system will automatically generate a Delivery Fee Item ID for you in the field to the right. By default, we set the Delivery Charge amount to $7.99 because that is what DoorDash charges per delivery, and you would have to pay the fee otherwise.
- Service Charges – You can use this area to set up the base Service charge that will be applied to each delivery. In the first field, the default Percentage of 5% will be there, but you can increase it if you prefer. The system will charge 5% regardless, so if you set it for less, you'll end up paying the difference. In the second field will populate the Charge Item ID automatically for your Service Charges.
- Service Charges Type – You can set your Service Charges to be either Dollar Amounts or Percentages here.
- Service Charges Label – You can enter the Label (name) you want to appear on the sale for your Service Charges on your receipts and reports here. By default, this is titled Service Fee.
- Tip Item ID – The delivery automation will also accept Tips. The system auto-generates the item ID here for your tips.
- Minimum Order Subtotal – If there is a minimum dollar amount a Webstore order needs to meet to qualify for delivery you can enter that Dollar Amount here.
- Delivery Providers – Bottle POS currently integrates with DoorDash for order deliveries. You do not need an account with DoorDash for this integration, it operates seamlessly in the background. If you wish to use DoorDash for your deliveries you can select them from the drop-list. Please note that other items on the list, such as First Providers, are not actually active options at this time.
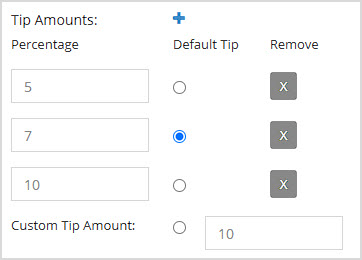
- Tip Amounts – You can enter preset Tip Amounts here. The minimum amount DoorDash allows is 15%, and they will keep and manage the tip payout for the driver. Click the Plus button to add preset amounts that are common. Customers will also have the option of doing a Custom Tip Amount, and you can enter the default Dollar Amount that will display in that field. They will be able to change that number to whatever they want. Click the radio button for the Tip Amount you want to be the Default Tip for your orders. You can use the X buttons on the right of each Tip Amount line item to remove that Tip Amount.
Payment Options
The Payment Options area is the second one in the right column on the Webstore Settings page. In this area you can configure the following settings:
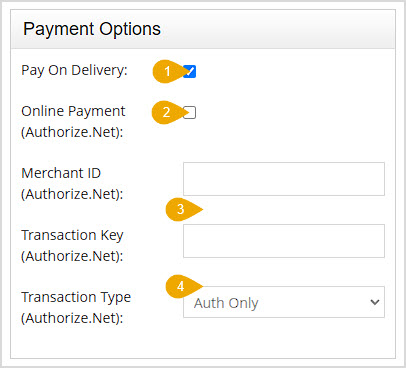
- Pay on Delivery – You can check this box if you want to offer your Webstore customers the option to Pay on Delivery. Payment can be via cash or whatever payment methods the delivery driver can use.
- Online Payment – This setting will allow your customers to pay via credit or debit card through the Webstore. This is set up by the Bottle POS team for you and requires you to have an Authorize.net Merchant account.
- Authorize.net Credentials – The tech support team will set this up for you.
- Transaction Type – You can choose how you want Authorize.net to handle card charges through your Webstore. Auth Only will authorize the funds but will wait to actually charge the card until you review the order and click to collect the funds, and is the best option for most stores. Auth and Continue will authorize and charge the funds at once and you will not have the chance to review or accept the order.
Items Settings
The Items Settings area is down the page in the middle of the right column on the Webstore Settings page. In this area you can configure the following settings:
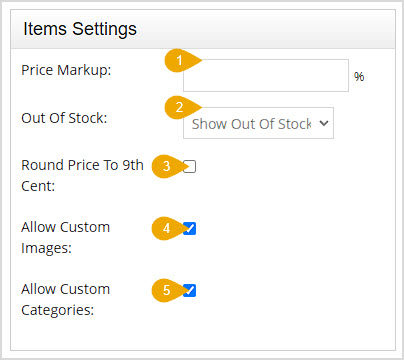
- Price Markup – If you want to mark up your prices for online sales, enter the number for the percentage of Price Markup you want to apply here.
- Out of Stock – Use this area to configure how you want the system to treat out of stock items. You can Hide Out of Stock Items, Show Out of Stock for them, or Ignore Inventory Level to sell items you might not have on hand but can fulfill from nearby inventory for a web order.
- Round Price to 9th Cent – Check this box to have all Webstore Prices round up so they end with a nine. For example, an item that might have a price of $11.73 would be rounded up to $11.79.
- Allow Custom Images – Check this box to allow the use of Custom Images for your items in your Webstore. Once this is active, images you add to individual Items will also appear on your Webstore. Please note that this is a feature only available if you are using the Bottlezoo Premium feature.
- Allow Custom Categories – Check this box to allow item organization by Custom Categories for your items in your Webstore. Bottlezoo will automatically categorize your items, but if you would rather use your own Categories from the Bottle POS system, you can turn on this option if you have the Bottlezoo Premium feature.
Homepage Settings
The Homepage Settings area is at the bottom of the right column on the Webstore Settings page. Here are the options you have in this area:
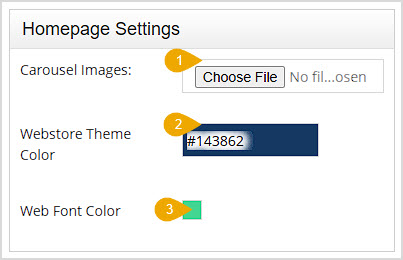
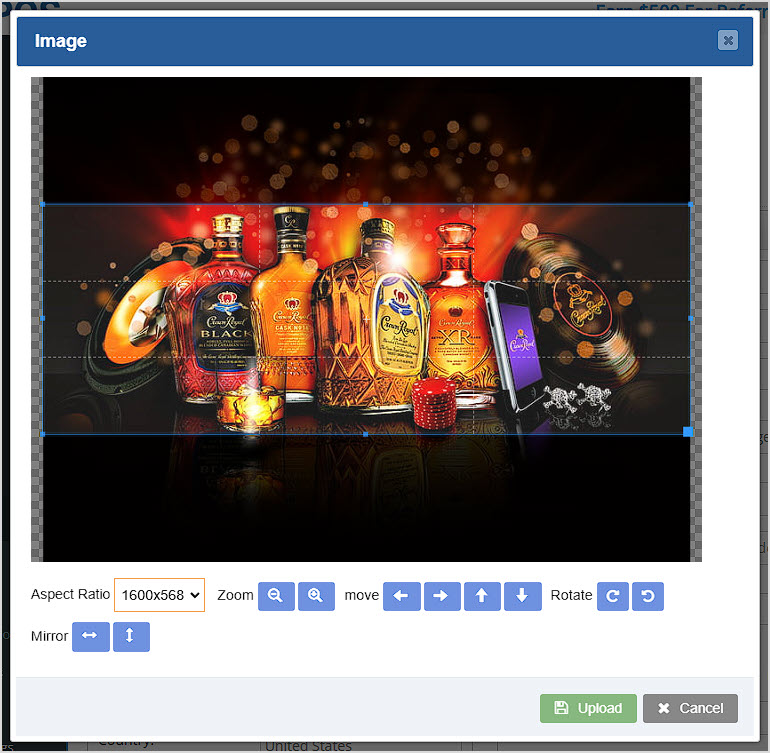
- Carousel Images – You can load images that your Webstore homepage will display in a carousel that cycles through them. Images in this area will display at 1600 x 568 pixels. Click the Choose File button to find an image and once you've selected it, the Image window will load and allow you to choose which part of the image will display in the Carousel, as pictured below:
- By default, the Aspect Ratio will be 1600 x 568. You can change the Aspect Ratio if you like, but the carousel may look inconsistent with different ratios as it scrolls through. For best results, use the same Aspect Ratio for all images.
- Use the Zoom In or Zoom Out buttons to focus on the parts of the image you want.
- You can either use the four directional Move buttons to move the image to feature the part of it you want, or you can drag the focus area with your mouse.
- You can use the Rotate Clockwise or Rotate Counter-clockwise buttons if needed.
- The Horizontal Mirror button will flip the image sideways, while the Vertical Mirror button will flip it up and down, if needed.
- When you've got the part of the image you want to show in the carousel displaying within the highlighted area, click the Upload button.
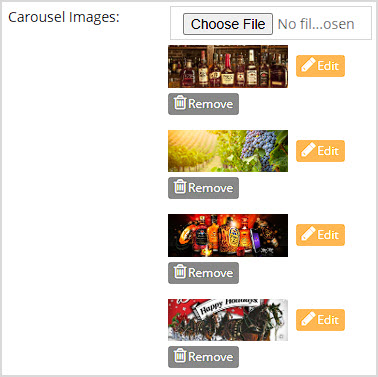
- For each image you upload, you will see a Thumbnail.
- There is no functional limit to how many images you upload this way, but as a practical matter, your customers won't see more than a few.
- Each thumbnail will have a Remove button to clear the image from the carousel and an Edit button that will open the Image window again if you need to make changes.
- Webstore Theme Color – You can enter the primary color you want for your Webstore header and footer backgrounds of your Webstore here as a Color Hexcode. You can click the color field to open the Color Picker or you can get the color you want from an image editing application or a free website such as this one.
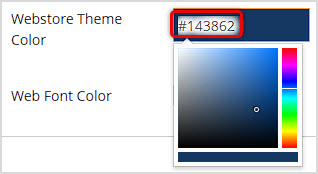
- Web Font Color – You can set the primary color for your Webstore text using the Color Palette here. Click the color swatch button to open the palette, then click on the color you want. We advise choosing a color that contrasts nicely with the Theme Color above. If needed, our support team can work with you to find a color scheme that will serve your needs.

Delivery Locations
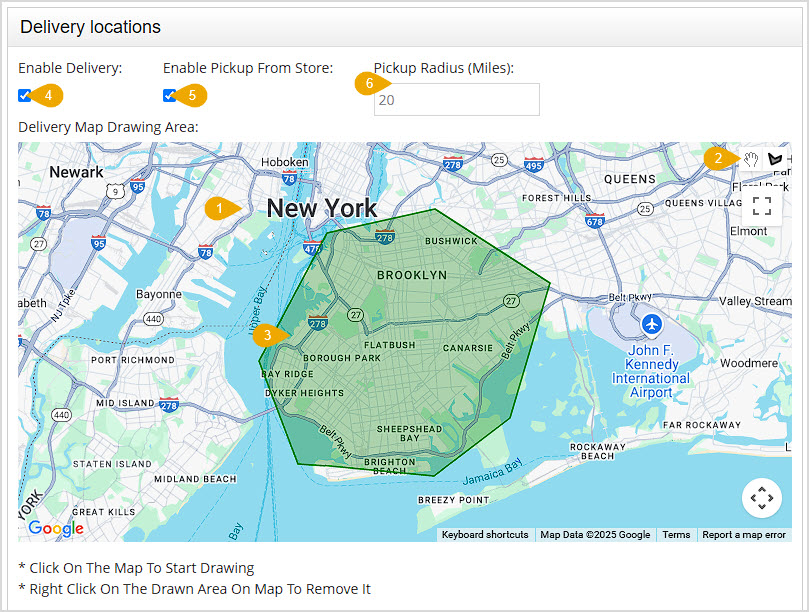
The Delivery Locations area is at the bottom of the Webstore Settings page. In this area you can set your delivery and pickup area via our interactive map powered by Google.
Here is a short video overview of how to work with this area:
- Zoom to Your Area – The map will initially load as a broad world view. Here is how to zoom to your area:
- You can use the Hand tool in the upper right if you need to drag the map so your region is visible.
- Hover your mouse pointer over your region and hold down the Ctrl key, then use your scroll wheel on your mouse and scroll up to zoom in until you can see the area in which you deliver, as in the example above.
- Click the Draw Tool – In the upper right, click on the Draw Tool's polygon icon.
- Define Your Delivery Area – Click on the map to start adding points defining the area in which you are willing to deliver Webstore orders. Surround the entire area you serve and when you get back to your first point and click, the area will display in green as pictured above. You can do this for as many areas as needed, the map will automatically zoom out to better feature your selected areas as you define more of them. Please note, if you need to re-do an area you have drawn, you can right-click on the area and the map will ask you if you want to remove it.

In our example, if we also deliver to lower Manhattan, we can add that as an additional area.
- Enable Delivery – Click this checkbox to either Enable or Disable Delivery. The area(s) you defined above will remain if you turn this off, but with it off your Webstore will no longer offer delivery service. You can turn it back on again any time.
- Enable Pickup From Store – Check this box if you want to allow Webstore orders to be picked up by the customer at your store.
- Pickup Radius – You can set how far away you will allow customers to be from your store by entering a number in miles into this field. If you want to accept any pickup orders regardless of the customer's billing address from the store, leave this blank.
For any adjustments you make in these settings, remember to scroll to the bottom and click the Save button.
Related Topics
General Settings
POS Settings
BottleZoo Online Ordering Walkthrough
Frequently Asked Questions
Q: How many images can I load in the homepage carousel?
A: There is no functional limit to how many images you add to your carousel, but as a practical matter your customers won't see more than a few of them.
Q: I have a question, but I can't find my answer here, how do I get more assistance?
A: You can ask any question at the number below. Contact our 24/7 support team at: (877) 381-4087
 October 01, 2024
Is this page helpful?
×Help us improve our articles