The Bottle POS Admin has powerful tools for working with your customers. Take a look at how easy it is!
You can get to this part of the system by logging into your Admin app and clicking Customers on the left.
The Customers Page
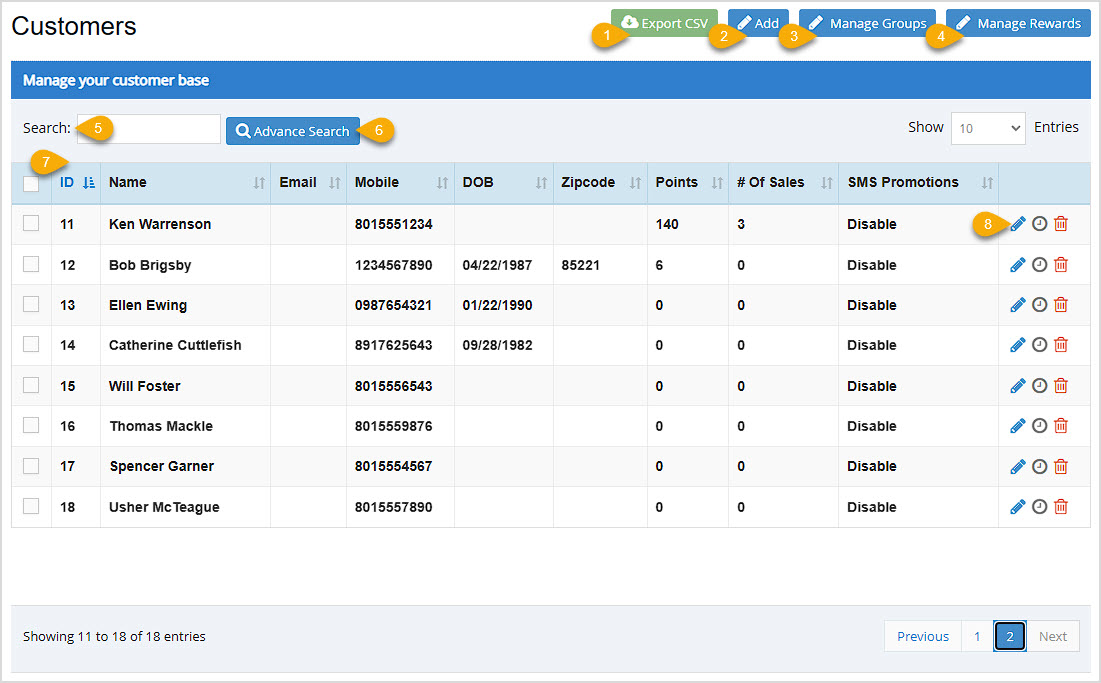
Your Customers page has several tools for working with your customers in ways that empower your business.
- Export CSV - Click this button to download spreadsheet data (the data shown in the table above) for all of your customers. You can use the checkboxes on the far left of each customer's line in the data table to export only selected customers using this feature.
- Add Customer - Click this button to add a new customer to the system. You can enter Name, Mobile phone number (this is the only required field), Email, Date of Birth, Address, Zipcode, and reward Points information. You can also enroll them to receive SMS & Email Promotions, enable a House Account, and set the Max Dollar Amount of Balance for the house account here.

- Manage Customer Groups - If there are specific groups of your customers to which you want to send promotional emails or SMS text messages, you can create those groups here. Click the Manage Groups button to see a list of any groups you've already created. The system will give each group a simple ID number, and you'll see each group's Name and the Number of Customers in it. You also have Edit and Delete actions for each. If you have a lot of groups, you can Search for the one you want.
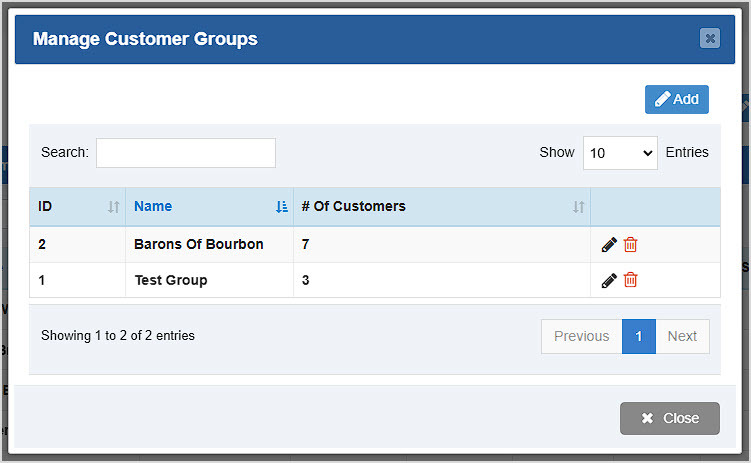
You can click the Add button to create a new Customer Group. Please see the Working with Customer Groups section below for more details.
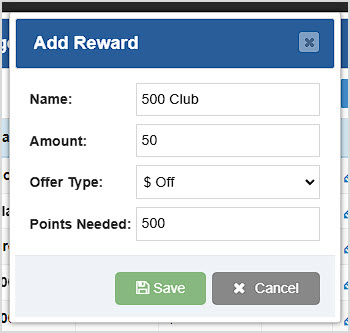
- Manage Rewards - You can manage your Loyalty Rewards and create new ones by clicking this button. The Rewards you create will be given a simple ID by the system, but you can see each Reward's Name, Amount (dollar amount or percentage, based on the Type), Offer Type (Percent Off or Dollar Amount Off), and how many Points are required for eligibility. On the right you can click the pencil icon to Edit a reward, or the trashcan icon to Delete. Click the Add button to add a new Reward.

- Search - You can Search here by name, email, mobile number, or date of birth to get to the customer(s) you want.
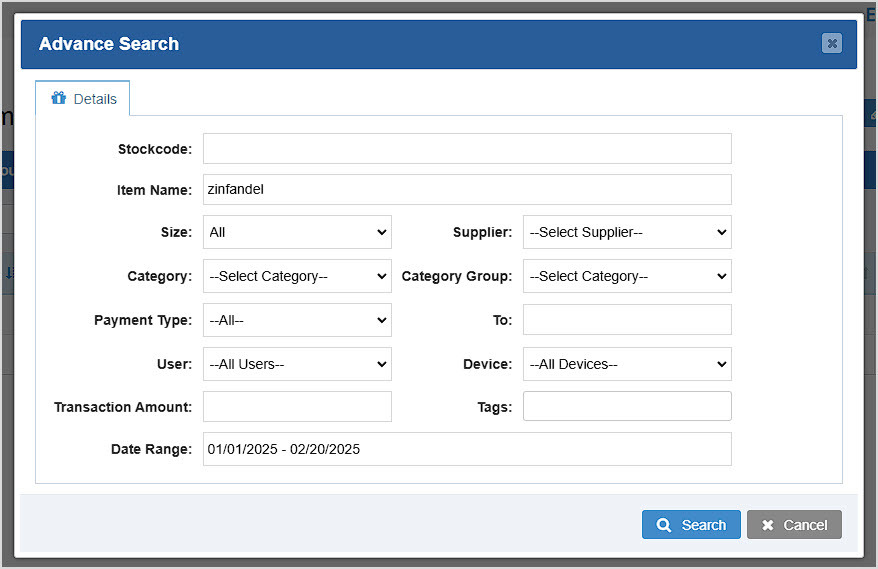
- Advanced Search - Clicking this button will open a very powerful way to find customers based on items they have purchased. You can search by Stockcode, Item Name, Size, Supplier, Category / Category Group, Payment Type used in the transaction, To amount (filters for customers who have had purchases up to the specified amount), the User who was the sales clerk for the transaction, the Device for the transaction, the Transaction Amount, any Tags associated with Items, and you can set the Date Range for the period you need. Click the Search button to have the data table apply the advanced filters. Click the Clear Search button to reload all customers.
- Data Table - The data table will display the simple system-assigned ID for each customer as well as their Name, Email, Mobile phone number, Date of Birth, Zipcode, reward Points, Number of Sales, and SMS Promotions status (Enabled or Disabled). You can click on any column header to sort or reverse sort alphanumerically.
- Action Icons - On the far right of each customer's data line are the following functions:
- Pencil Icon - Click to Edit the customer information.
- Clock Icon - Click to view the customer's History (more details below on this powerful feature).
- Trashcan Icon - Click to Delete the customer. You'll be asked to confirm deletion, just in case.
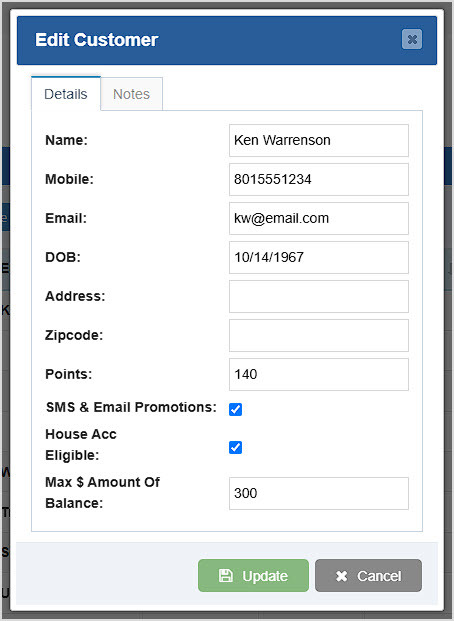
You can adjust a customers Details or add / edit Notes on the account.
The Customer History Window
The Bottle POS provides rich detail and useful tools for working with your customers. When you view a customer's history by clicking the Clock Icon, you have access to the following features:
Stats
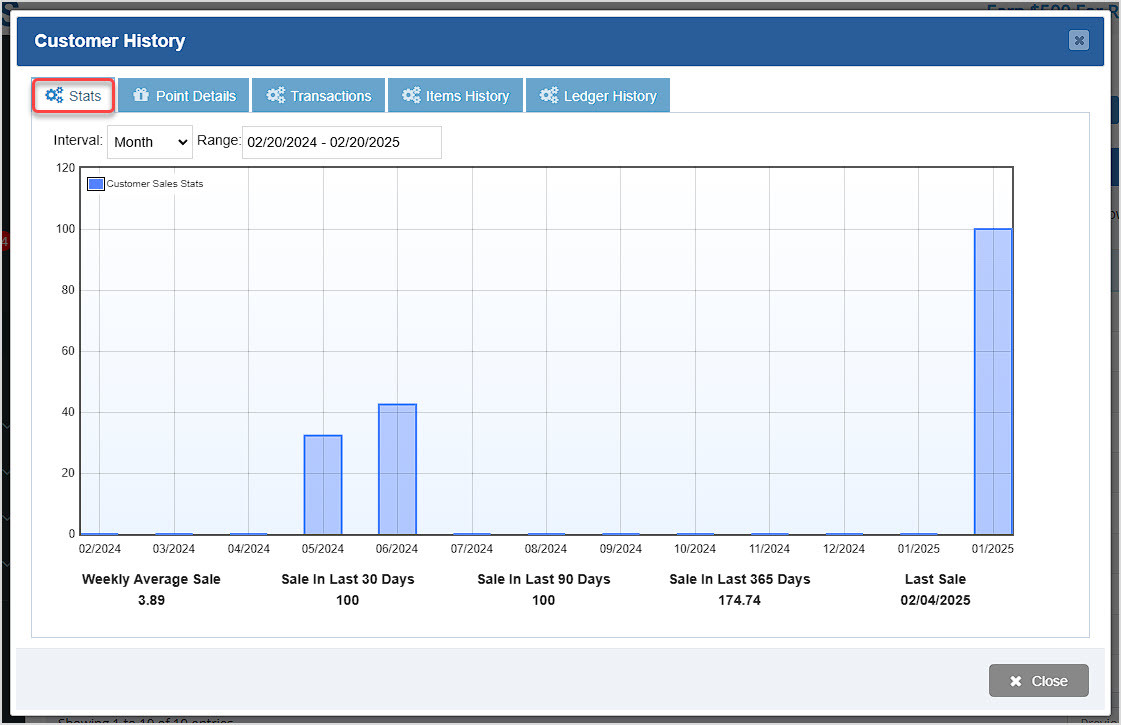
The Stats tab lets you set an Interval (Day, Week, Fortnight (two weeks), Month, 3 Months, or Year) and the date Range to whatever you need and displays the customer's spending over time. Below the graph are some useful statistics, including dollar amounts for Weekly Average Sale, and Sale in the Last 30, 90, and 365 Days, as well as the date of their Last Sale.
Point Details
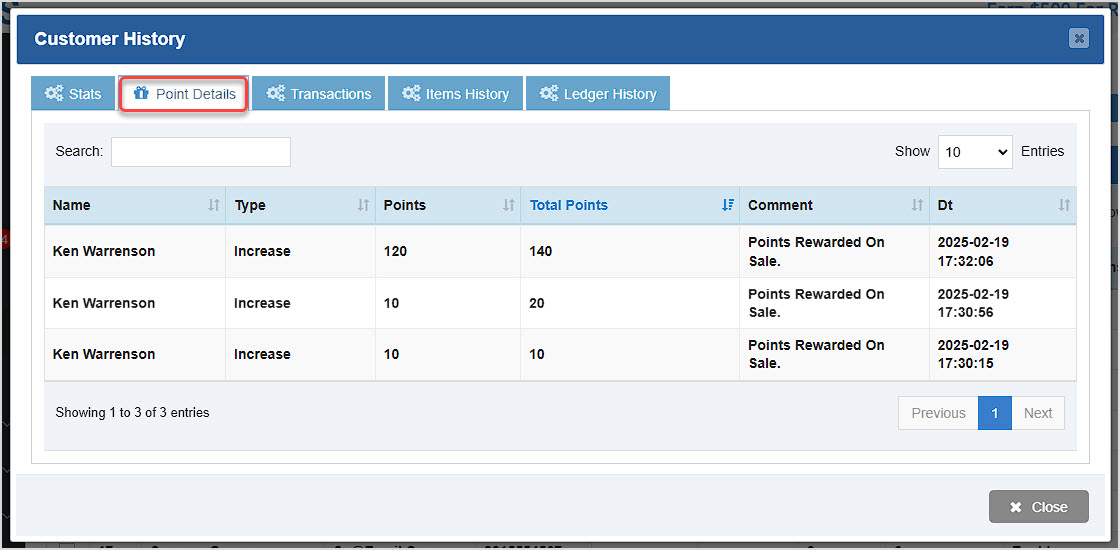
In the Point Details tab you can see a list of all events affecting the customer's Reward Points. There is information including their Name, the Type of event, the number of Points, the Total Points for the customer after the event, a Comment serving as an event description, and the Date the event occurred. If you need to look up a specific event you can Search for the number of Points of the event. You can also click the column headers to Sort alphanumerically.
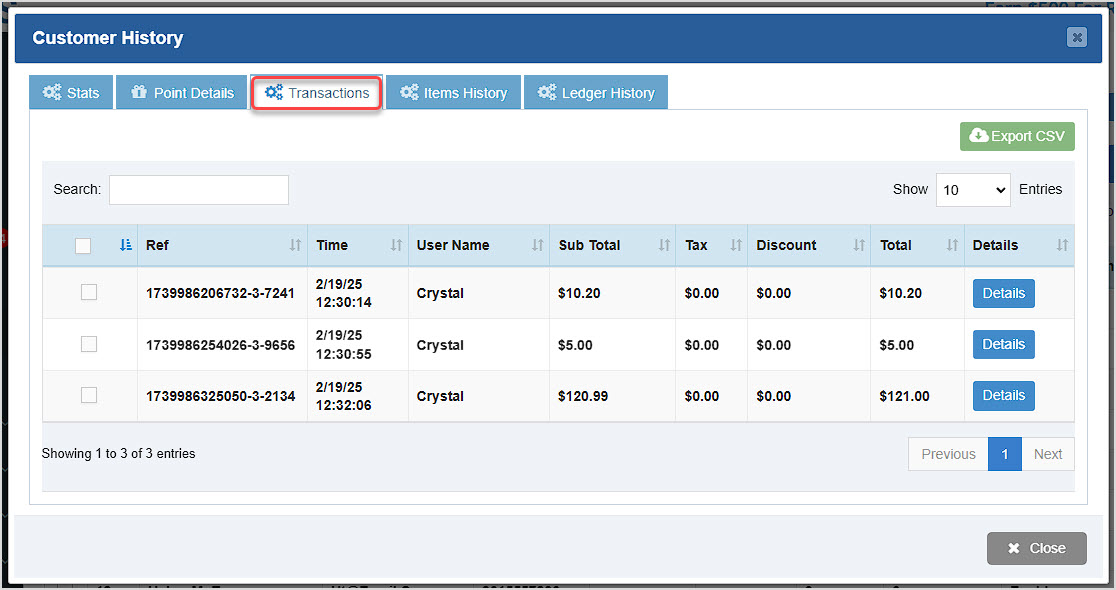
Transactions
You can use the Transactions tab to look up any sale the customer has done throughout their history. The Search field allows you to find sales by their Reference number or by dollar amount. You can also click Details to view the full transaction details window. Click the Export CSV button to download a spreadsheet of all transactions for the customer, or you can use the checkboxes on the left and download only those you've selected.
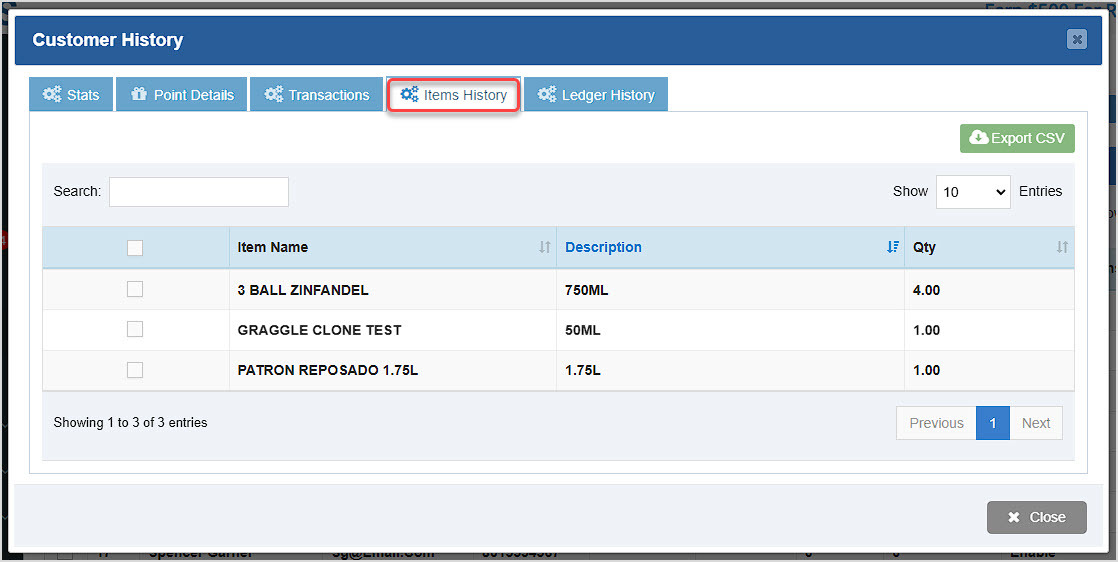
Items History
The Items History tab lists every item the customer has ever purchased. You can see the Item Name, Description, and the Quantity of the item the customer has bought in total. The Search field will let you find what you want by name or numerically. You can click the Export CSV button to download a spreadsheet of all of the data, or you can use the checkboxes on the left to download only those you need.
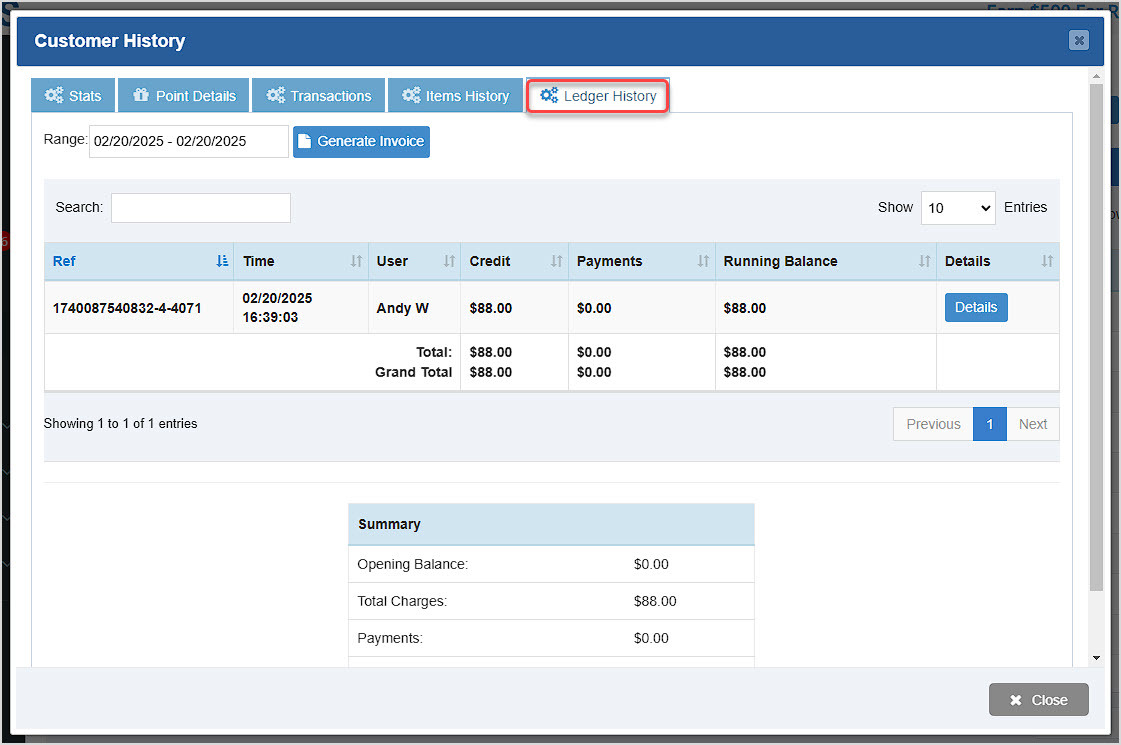
Ledger History
The Bottle POS system allows you to give trusted customers a House Account that lets them run a 'tab' on purchases they will pay off at a later time. You can view the House Account usage history from the Ledger History tab. You can set the date Range you want to view at the top. Click the Generate Invoice button to have the system create an invoice to bill the customer.
The data table shows all transactions for the customer's House Account and you can click the Details button on the right side of each line to view full transaction info. The table shows the transaction's Ref number, the User that rang up the sale, the amount of Credit the customer used on the House Account, any Payments that have been made toward that balance, and the Running Balance across all owed amounts. You can click the column headers to Sort alphanumerically and you can Search by Ref number or dollar amount to find what you want. At the bottom of the table, you can see the Total of the current page, or if the customer has enough items, the Grand Total across all pages. Below the table is a Summary showing the Opening Balance, Total Charges, Payments, and Closing Balance for your reference.
Working with Customer Groups
When you click to add a new customer group or edit one, you'll see the window below, and here is how you can work with your groups:
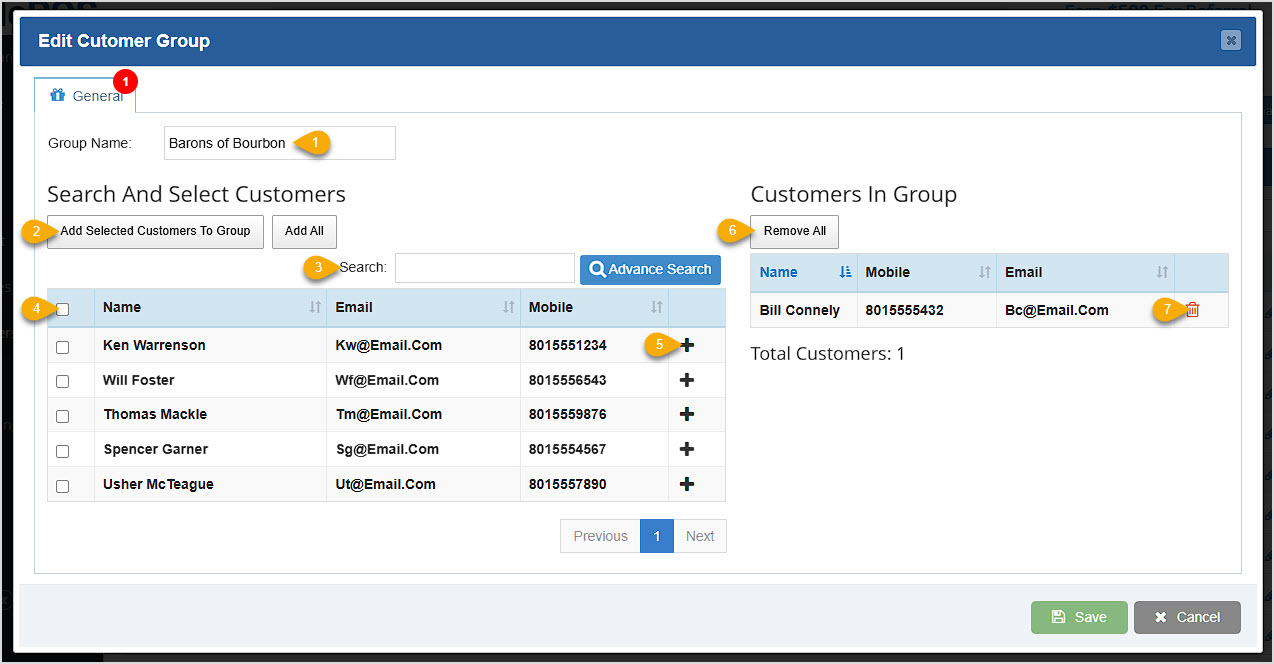
- Group Name - Enter the name you want for your customer group.
- Add Customers Buttons - The customers that display in the table are those that have their SMS Promotions enabled, and initially it will display all such customers. If you have selected any using the checkboxes you can click Add Selected Customers to Group and they will populate on the right. Or you can click Add All if you're making a group of all of your promotion-enabled customers.
- Search / Advance Search - You can Search by name, email, or mobile number to find the customer you want. Alternatively, you can click Advance Search to find customers who have bought certain items based on how they paid, a transaction amount, the sales clerk associated with the transaction, or the Device used for the customer's transaction.
- Checkboxes - You can select customers if you are adding multiples to the group here, then use the button above to add only those customers.
- Add Customer - You can use the Plus buttons on the right of the data table to add individual customers.
- Remove All - Customers that have been added to the group will be in the smaller table on the right. If you need to start over, you can click the Remove All button to clear the names.
- Delete - You can click the Trashcan Icon for any customer in the group to remove that person. This only removes them from the group, it does not delete them from the POS.
Related Topics
How to Set Up and Use a Customer House Account
How to Enable and Use Customer Loyalty
How to Generate and Email an Invoice from a Sale
Frequently Asked Questions
Q: Do I have to use the Admin to add a new customer? What if I'm in the Register?
A: You can add new customers from the Register by entering their cell phone number in the Customer Mobile field in the Register, then click to Create New Customer.
Q: How can I see my customer balances for those I've given House Accounts?
A: You can see a list of all customers with that permission and their balances in the Admin by going to Reports. In the reports drop-list, open the House Account Report.
Q: If a customer is tax-exempt, how do I set that up properly?
A: This article can show you how to configure tax for a customer or business: How to Disable Tax for a Customer or Business
Q: I have a question, but I can't find my answer here, how do I get more assistance?
A: You can ask any question at the number below. Contact our 24/7 support team at: (877) 381-4087
 October 01, 2024
Is this page helpful?
×Help us improve our articles