The POS Sales Manager is your hub for managing your store's transactions. This article will guide you through searching for a transaction, viewing a transaction's details, reprinting receipts, deleting a transaction, and exporting transactions to a spreadsheet format.
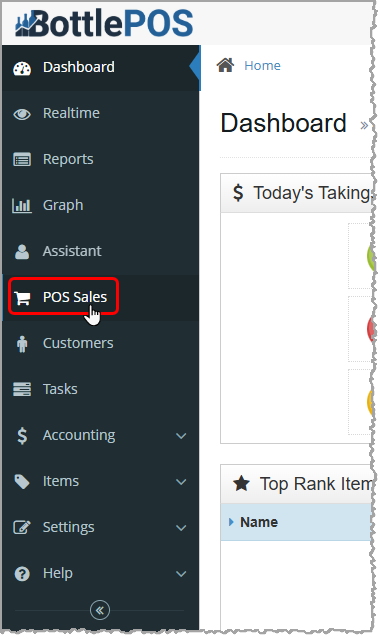
To access the POS Sales manager, log in to your Admin site then click the POS Sales tab on the left. You must have Admin privileges to use the POS Sales manager functions.
The POS Sales Manager

- Home – Click to navigate away from Reports back to your Dashboard.
- Refresh – Click to Refresh the page if sales data may have been updated since you loaded the page.
- Ref – Enter the transaction reference number, or a portion of a reference number, and click the Search button to find transactions matching that number.
- Search – Click this button to search for transactions with a reference number matching your entry in the Ref field.
- Export CSV - Click to Export all the data in the report to a CSV file (spreadsheet).
POS Sales Manager Data Table
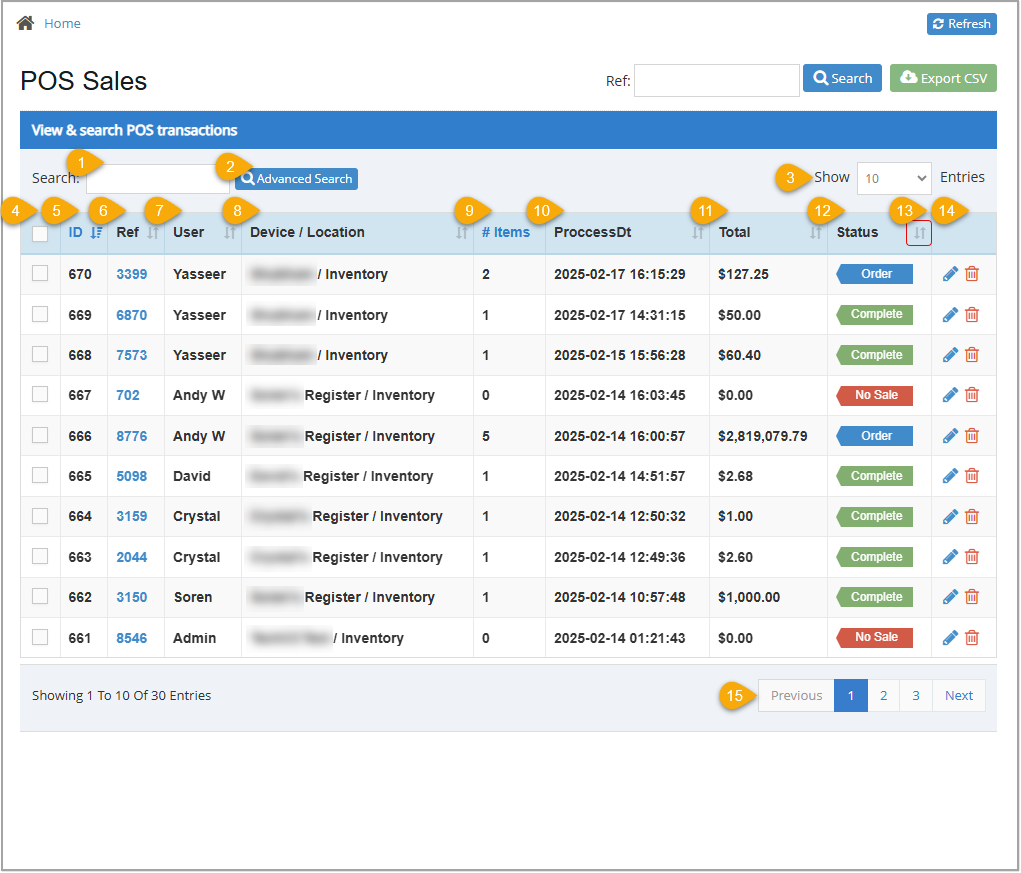
- Search – Enter any text here to Search for a specific row in the data table. You can search by keyword or numeric amounts. The starts searching for matches as soon as you start typing. For instructions on how to use this feature, see below.
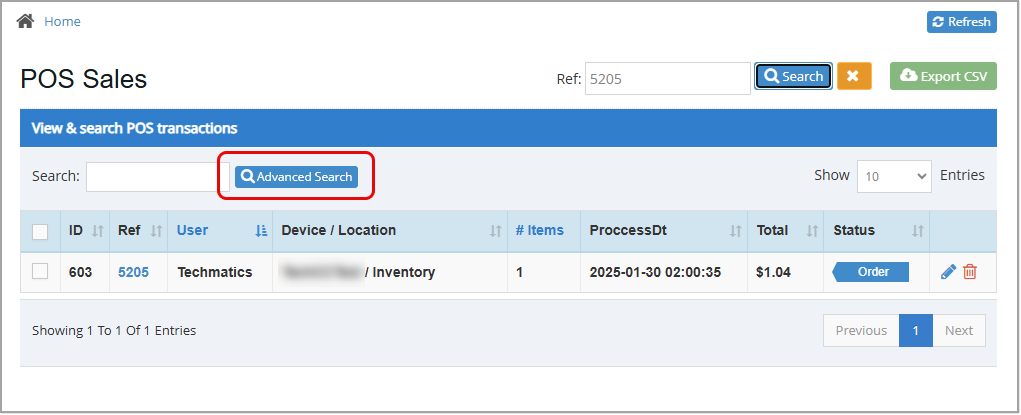
- Advanced Search – Click this button to open the Advanced Search window where you can use any information you have to locate a specific transaction. For instructions on how to use this feature, see below.
- Show Entries – Click and select 10, 25, 50, or 100 to show that many results per page on your report.
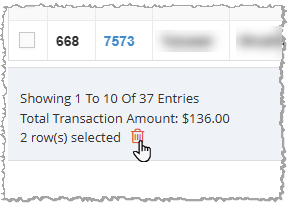
- Checkboxes – Select a checkbox for each row you want to Export to CSV or Delete. Check the top-most checkbox (in the table header) to select each row on the page. As you select checkboxes, the transaction totals calculate below the table. When you've selected what you need, either click the Export CSV button at the top of the window, or click the Trashcan icon below the table.
- ID – This column displays the transaction ID associated with each POS transaction. You can find this ID in the transaction details and serves as a quick way to pull up a transaction.
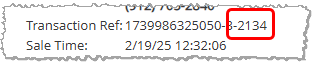
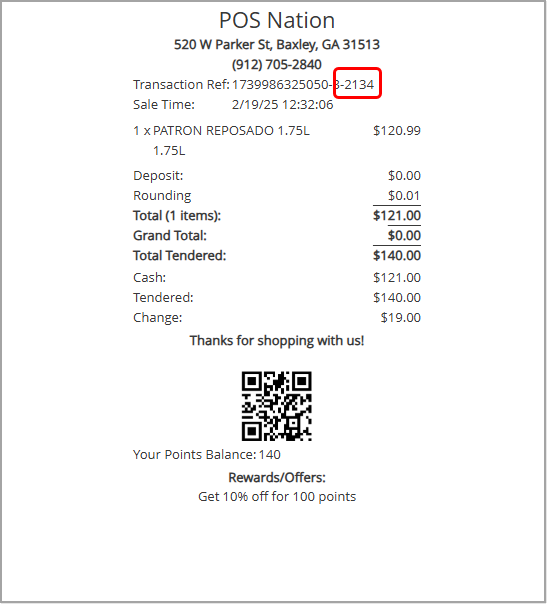
- Ref – This column displays the suffix of a transaction's Reference ID Number. You can find this after the final hyphen at the top of a receipt. For example, the top of your receipt may look like this:
- User – This column displays the username of the staff member who entered each transaction.
- Device / Location – This column displays the name and inventory location of the device used for each transaction.
- # Items – This column displays the number of items sold in each transaction.
- Process Dt – This column displays the date and time of each point of sale transaction.
- Total – This column displays the receipt total for each transaction.
- Status – This column displays the current status of each transaction. Statuses include: Complete, No Sale, Cancelled, Order (new Webstore order), Accepted (accepted and in process Webstore order), Declined (declined Webstore order), Void, and Refunded.
- Sort –
 The Sort icon displays in the header row of any sortable column. The currently sorted column displays in blue, as shown on the left. All other sortable columns show this icon in gray, as shown on the right. Click the column header of any sortable column to sort the table alphabetically or numerically, depending on the information in that column. Click it again to reverse the sort order.
- Actions – Use these icons to edit a transaction or delete it from the table:
- Click the Pencil icon
 to open the Transaction Details window. From there you can Edit the transaction to add notes, view sale details, edit customer details, reprint a receipt, generate and email an invoice, view invoice history, or download the invoice details to a CSV file.
- Click the Trashcan icon
 to remove the transaction from the table.
- Previous / Next – Click Previous or Next to navigate to another page of report results.
Searching for a Transaction – Quick Search
To quickly search for a transaction you'll need the transaction reference number suffix. You can find this on receipts, as shown in the image below. If you do not have a transaction's reference number, use the Advanced Search method instead.
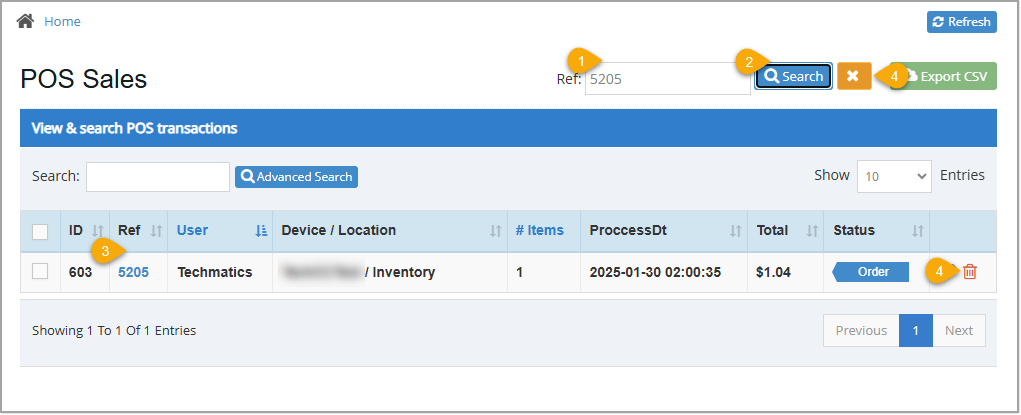
- If you know the reference number, enter the final digits after the hyphen into the Ref field at the top of the POS Sales window.
- Press your Enter key or click Search.
- Any transactions that match the number you entered will display in the table, as shown here:
- To start a new search, select and delete your previous entry or simply click the yellow X button
 next to the Search button to clear your previous search and enter a new one.
Please Note: You can also use the Search field just above the data table to search by User, Device, Date and/or Time, and the dollar Total of the transaction, if you have that information.
Searching for a Transaction - Advanced Search
Use Advanced Search to search for a transaction when you don't know the reference number.
To access Advanced Search, click the Advanced Search button.
In the Advanced Search window, enter any combination of search criteria. Only one completed field is required to perform a search, but you can enter as many as you want. The more you enter, the more specific your search results will be. After you enter your search data, click the Search button at the bottom. The Advanced Search window will close and your search matches will display in the data table of the POS Sales page.

- Item Name – Enter the name of a product in the transaction. This does not need to match exactly to find results.
- Item Code – Enter the Stock Code of a product in the transaction.
- Payment Type – From the drop-list, select the tender type used to complete the transaction.
- Transaction Amount – Enter a range of dollar values in the From and To fields to search for transactions with totals between those values.
- User – From the drop-list, select an employee username to search for transactions entered by that employee.
- Order Type – Select the type of order from the drop-list to search for either Web or POS transactions.
- Device – From the drop-list, select a device name to search for transactions made using that device.
- Ref Number – Enter the reference number suffix (the digits after the final hyphen in the Transaction Reference ID) to find the transaction.
- Last Four Card – Enter the last four digits of the credit card used to pay for the transaction to find any transactions completed with that card.
- Date Range – Select a range of dates on the calendar to search for transactions that were completed during that range.
- Status – Select a transaction Status to filter transactions to those with that status, or select All to see all transactions. Statuses include Pending, Order, Complete, Refunded, Void, Declined, Accepted, Canceled, and No Sale.
- Search – Click this button to perform the advanced Search using your selected criteria. Results will display in the POS Sales data table.
- Cancel – Click to Close the window and return to the POS Sales Manager.
Related Topics
How to Find Transactions
How to Process a Return
Working With Transaction Details in the Admin
How to Void Transactions
Reprinting Transaction Receipts
Downloading Transactions
Deleting Transactions
Frequently Asked Questions
Q: What's the difference between voided and deleted transactions?
A: A voided transaction remains as a valid transaction in the database. A deleted transaction will have no permanent record. It is important to know that neither action can be reversed.
Q: Is there a quick way to search for transactions from the Register?
A: Yes, you can use the Sales Tab from the register to quickly look up transactions. Please note that you won't have full access to the search features available in the POS Sales Manager. Review this article for more information: How to Find Transactions
Q: How do I return a transaction?
A: To process a return, you will need to log in to the Register and navigate to the Sales tab. Review this article for more Information: How to Process a Return
Q: I have a question, but I can't find my answer here, how do I get more assistance?
A: You can ask any question at the number below. Contact our 24/7 support team at: (877) 381-4087
 October 01, 2024
Is this page helpful?
×Help us improve our articles