You are able to work with your completed transactions from your Admin in the POS Sales area. The system has powerful tools for working with your transactions, take a look!
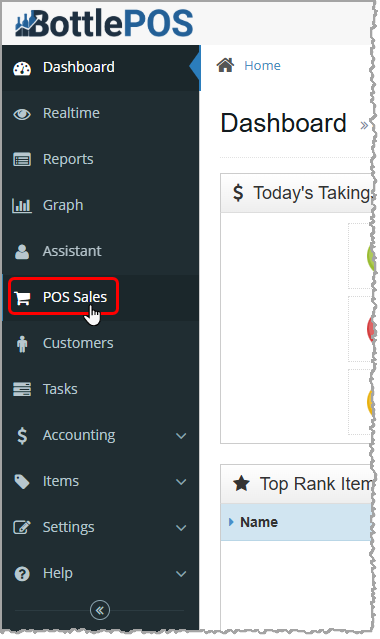
You can get to this part of the system by clicking POS Sales on the left in the Admin menu. In the POS Sales manager find the transaction you want. You can do a quick search in the Ref field if you have the suffix of the transaction's Ref ID, or you can use the standard Search field to search by keyword, date, or total dollar amount. You can also use the Advanced Search if needed.
The Transaction Details Window

Once you've found the transaction you want, click the Pencil icon on the far right of the table to open its Transaction Details window.

- Status – This area displays the current status of the transaction. Statuses include: Complete, Order (new Webstore order), Accepted (accepted Webstore order), Declined (declined Webstore order), No Sale, Cancelled, Void, and Refunded.
- ID – This area displays the Transaction ID associated with the POS transaction.
- Ref – This area displays the transaction's reference number. The numbers after the final hyphen are the Ref ID suffix and you can use them to look up the transaction in the system.
- Trans DT – This area displays the date and time the transaction was completed.
- Process DT – This area displays the date and time the transaction was processed in the database.
- User – This area displays the username of the employee that completed this transaction.
- Device – This area displays the name of the device used to process the transaction.
- Location – This area displays the name of the inventory location where the transaction took place.
- Notes – Enter any notes about the transaction into this field, then click the Save button.
- Save – Click this button to save any edits to the notes for this transaction.
- Details Tab – This tab displays basic financial and customer information about the transaction. When you open the Transaction Details window the Details tab is active by default. If you were viewing a different tab in a previous Transaction Details window, it will open to that tab.
- Items Tab – This tab displays details about the items included in the transaction.
- Payments Tab – This tab displays details about the tender types and amounts used to pay for the transaction.
- Options Tab – This tab provides options to print a receipt, generate, email, or view invoice history, and download the invoice to a spreadsheet file.
- Void –You can click the Void button to void the transaction. You'll be prompted to enter the Reason for the void, click the Process button to proceed, then you'll be asked to click Yes to confirm. Once voided, the transaction will be in a Void status, its revenues will no longer apply in the sales reports, and inventory will be restored. If the transaction was run on an integrated terminal and you haven't batched out your processing, the funds will go back on the card. In all other cases, you will want to manually refund the customer before voiding.
- Close – Click this button to close the window and return to the POS Sales manager.
Details Tab of the Transaction Details Window
When you open the Transaction Details window the Details tab is active by default. If you were viewing a different tab in a previous Transaction Details window, it will open to that tab.
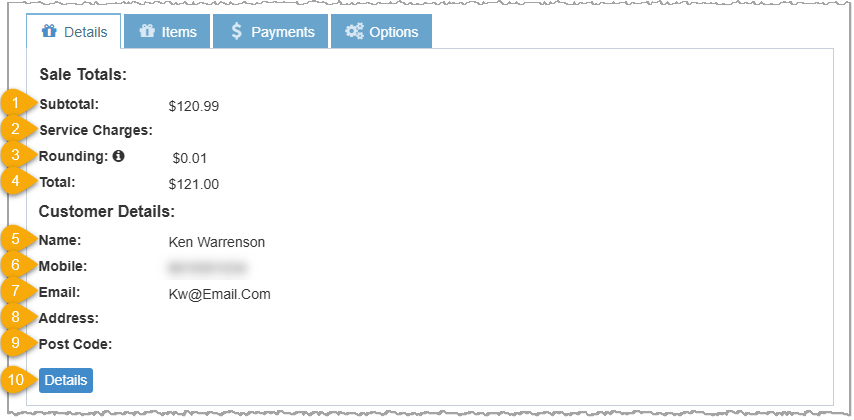
- Subtotal – This area displays the transaction subtotal before tax, any additional fees, or rounding.
- Tax (not shown) – This field displays the percentage used and the dollar amount of Tax charged in the transaction.
- Discount (not shown) – This area displays the percentage and dollar amount of any manual Discount applied in the Register.
- Bottle Deposit (not shown) – This area displays any dollar amounts charged or credited to the customer for bottle deposits in the transaction.
- Service Charges – This area displays any service charges applied to the transaction.
- Rounding – This area displays the round-up amount if you have configured rounding for your transactions. You can hover over the Info icon to see how your rounding is set.
- Total – This area displays the total charged for the transaction.
- Name – This area displays the name of the customer that made the purchase.
- Mobile – This area displays customer's mobile phone number.
- Email – This area displays the customer's email address.
- Address – This area displays the customer's street address.
- Post Code – This area displays the customer's postal code.
- Details – Click the Details button to open the Edit Customer window where you can view and edit customer details or add notes to the customer's account.
Items Tab of the Transaction Details Window
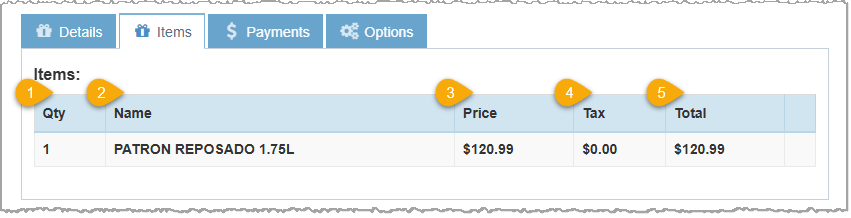
- Qty – This column displays the quantity of each item added to the transaction.
- Name – This column displays the name of each item included in the transaction.
- Price – This column displays the price of each item in the transaction. This is the price of a single unit and not the combined price.
- Tax – This column displays any tax applied to each item.
- Total – This column displays the total for each row including tax, so the Quantity multiplied by Price plus the tax.
Payments Tab of the Transaction Details Window
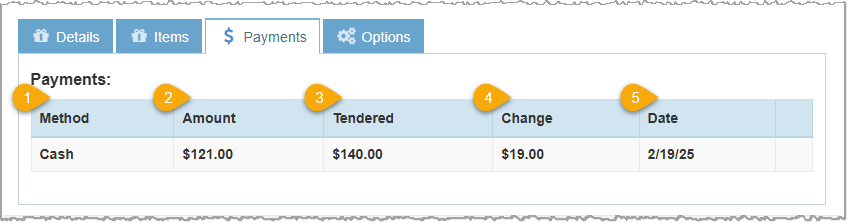
- Method – This column displays the payment method(s) used for this transaction.
- Amount – This column displays the total amount due for the transaction.
- Tendered – This column displays the dollar amount given to the cashier.
- Change – This column displays any change given to the customer.
- Date – This column displays the date the payment was made.
Options Tab of the Transaction Details Window
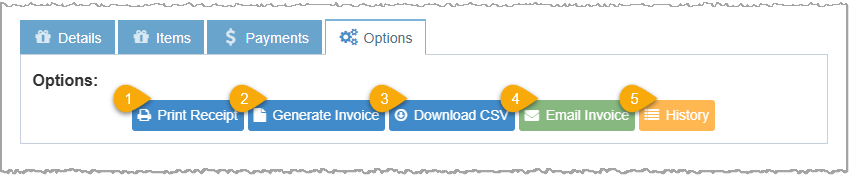
- Print Receipt – Click this button to open a Print window. From there you can print the receipt to a PDF file or to a connected receipt printer.
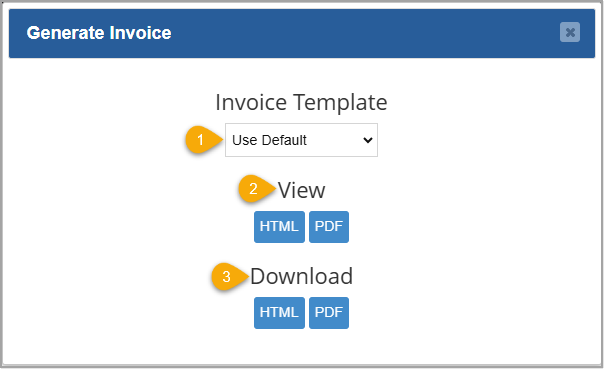
- Generate Invoice – Click this button to open the Generate Invoice window where you can 1) choose a template (you'll usually want the Default), 2) view or 3) download a copy of the invoice in HTML or PDF format.
- Download CSV – Click this button to download the transaction's details as a CSV spreadsheet file.
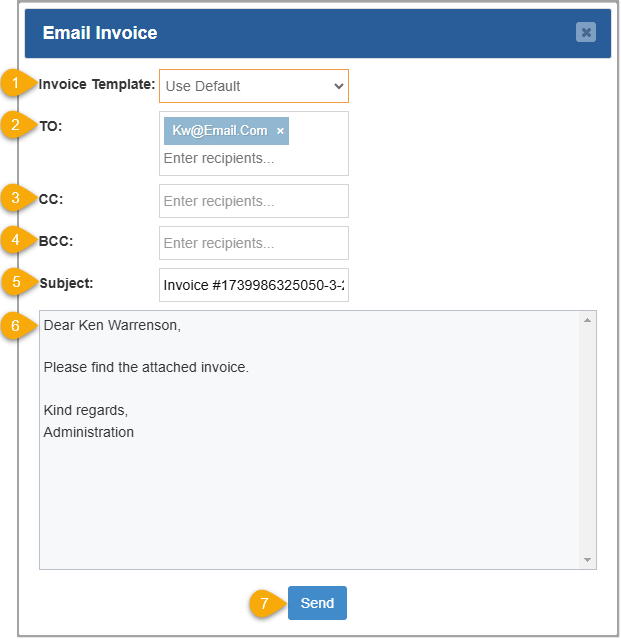
- Email Invoice – Click this button to open the Email Invoice window. You can 1) choose a template (you'll almost always use the Default), 2) use the email address on file or enter one manually, 3) copy other email addresses or 4) blind copy addresses if needed. You can 5) use the auto-populated Invoice number for the Subject or manually enter your own. In the body area you can 6) use the auto-populated message or manually write your own. 7) Click the Send button when you're finished.
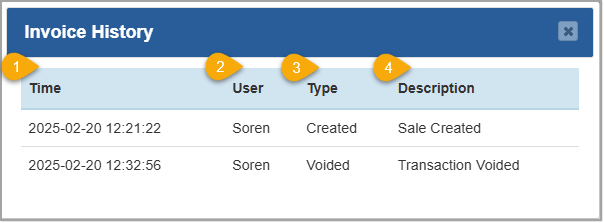
- History – Click this button to open the Invoice History window where you can view the 1) Time and Date of each invoice event, 2) the staff member's username for the transaction event, 3) the Type of transaction event, and 4) a Description of the transaction event.
Related Topics
How to Find Transactions
How to Process a Return
Working With Transaction Details in the POS
How to Void Transactions
How to Generate and Email an Invoice from a Sale
Reprinting Transaction Receipts
Downloading Transactions
Deleting Transactions
Frequently Asked Questions
Q: What's the difference between a voided transaction and a deleted transaction?
A: A voided transaction remains as a valid transaction in the database. A deleted transaction will have no permanent record. It is important to know that neither action can be reversed.
Q: Is there a quick way to search for transactions from the Register?
A: Yes, you can use the Sales Tab from the register to quickly look up transactions. Please note that you won't have full access to the search features available in the POS Sales Manager. Review the article linked above titled 'How to Find Transactions.'
Q: How do I return a transaction?
A: To process a return, you will need to log in to the Register and navigate to the Sales tab. Review the article linked above titled 'How to Process a Return.'
Q: I have a question, but I can't find my answer here, how do I get more assistance?
A: You can ask any question at the number below. Contact our 24/7 support team at: (877) 381-4087
 October 01, 2024
Is this page helpful?
×Help us improve our articles